
ABOUT SLEEKNOTE
Sleeknote focuses on helping you create a straightforward lead contact form without all the detailed hassle of editing. They offer three types of forms to choose from:
- Collect Email Addresses
- Promote
- Create Contact
You get to choose between three positions to place your form:
- Center
- Bottom left
- Bottom right
Finally, you get to choose between four types of layouts. Once you make your choices, you will be placed in the editor where you can then design your forms to your wants.
Sleeknote has minimal design and impact under control so you don’t have to worry about spending hours on creating a form.
WHO SHOULD USE SLEEKNOTE?
This service would be great for any business or company to use, since it’s minimally invasive and can be positioned in three locations, so those customers who don’t want to bother with it, don’t need to worry about it. The advanced targeting options of this tool are great for getting an unlimited number of leads.
However, this is definitely something to use for small and local business sites as well as e-commerce businesses, as well as entrepreneurs who host their own websites. This can’t be used if you are supported by a web platform such as Etsy, WordPress, etc. You need to make sure you are paying for hosting before you invest in this option so the integration is good if you understand how to make the best of it.
This service is also a little on the more expensive side as far as similar services go. For the basic program, it’ll cost you $55 per month and that gets billed annually, so starting prices are around $660 per year. You do get a free seven-day trial – no credit card needed – so you can try the experience for yourself.

HOW TO USE SLEEKNOTE SUCCESSFULLY
There are, of course, a few ways you can use Sleeknote, but I’m going to show you how you can be successful at:
- Building forms
- Setting goals
- Reviewing your tests.
Before we get started, I want to show you the dashboard and explain the simplicity of the Sleeknote design. Knowing how to navigate the site is very important when you’re using a service, so always try to familiarize yourself with a services’ dashboard.
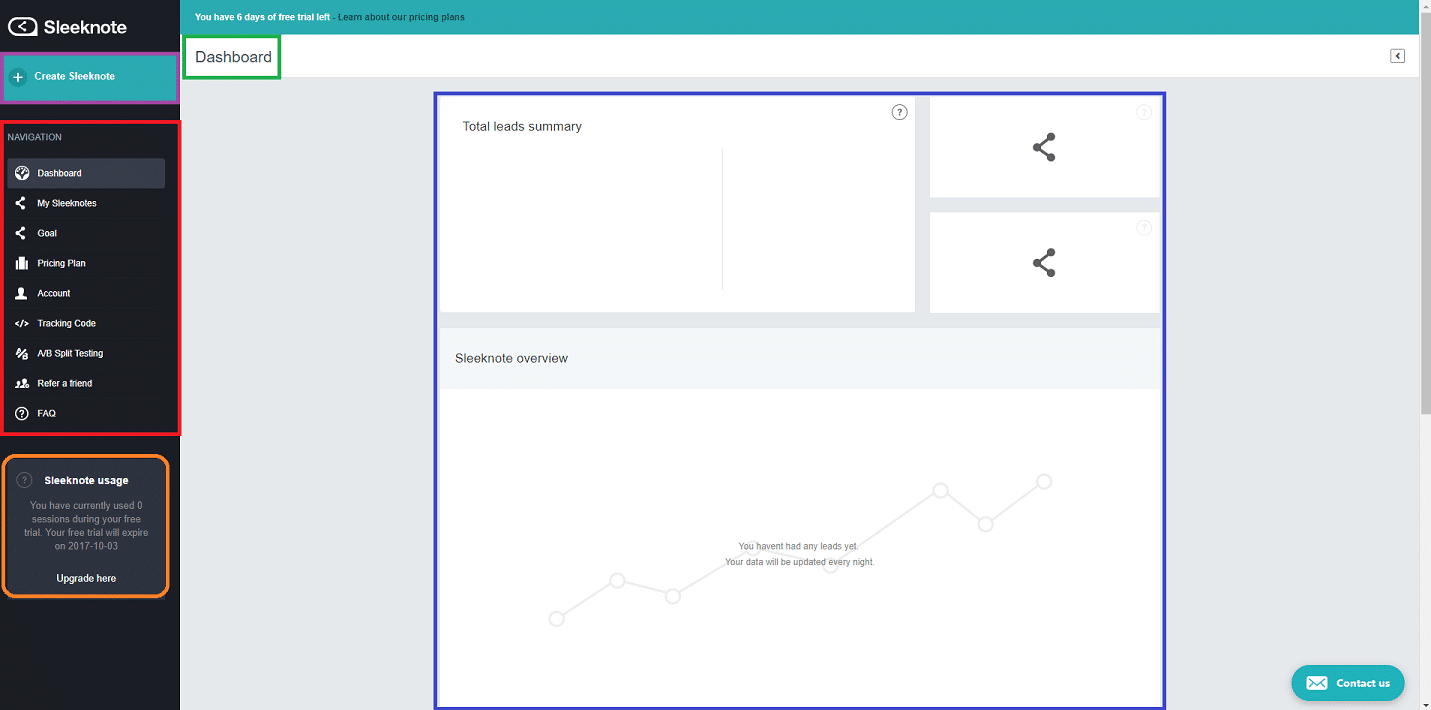
When you log in, you will be on the dashboard. Here is where you’ll see your current summary, your navigation panel, your usage, and the ability to create a Sleeknote.
Let’s get started!
Build a Lead Capture Form
We all want to locate our leads, get their emails and follow up with them. It’s how we build our client base, make sales, and increase our audience. It’s an important part of marketing – one I’d argue that is most crucial. Targeting the right people will help you make more sales and get that subscriber count up!
Building a lead capture form doesn’t need to be complicated. The process can be done in just 10 steps. This takes about 5 to 10 minutes from start to end.
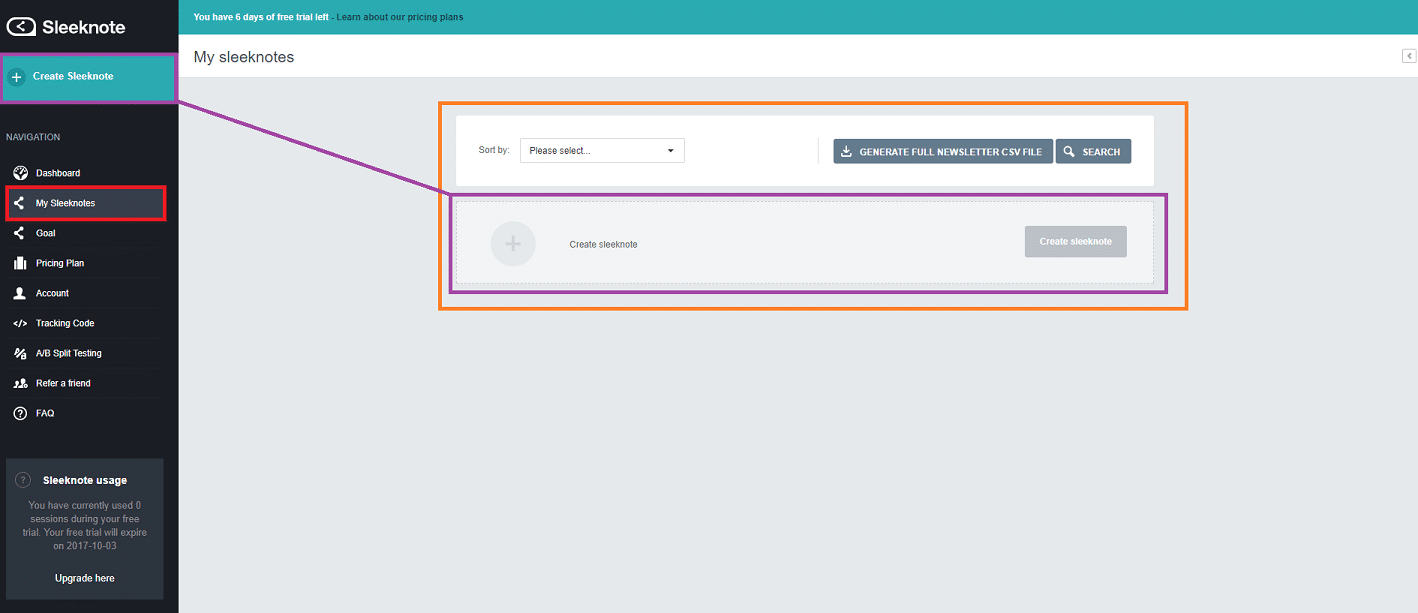
1. You can click on the Create Sleeknote above the navigation panel, or click on My Sleeknotes in the navigation panel and click Create Sleeknote on that page.
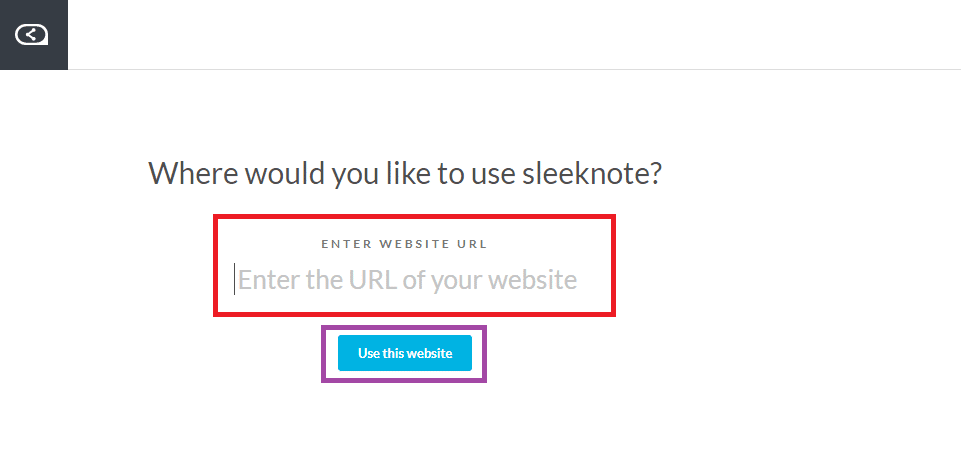
2. You will need to enter the URL of your website you wish to put this Sleeknote on. Then select Use this website.
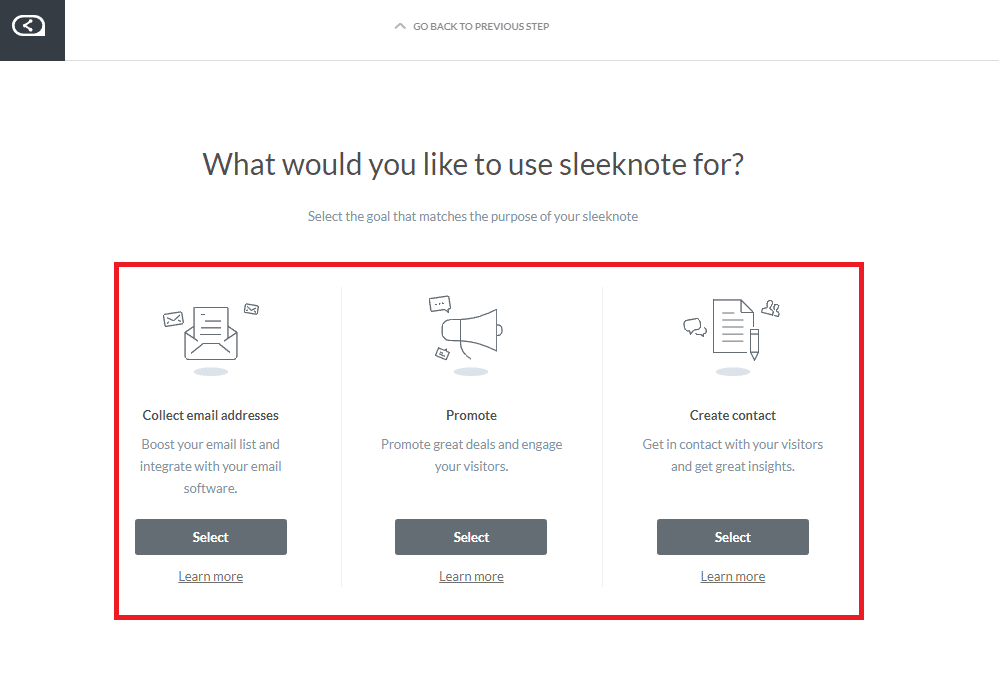
3. Next, you’ll need to select the use of your Sleeknote. Do you want to collect emails, promote an item, or create a contact? Select the one you want to proceed.
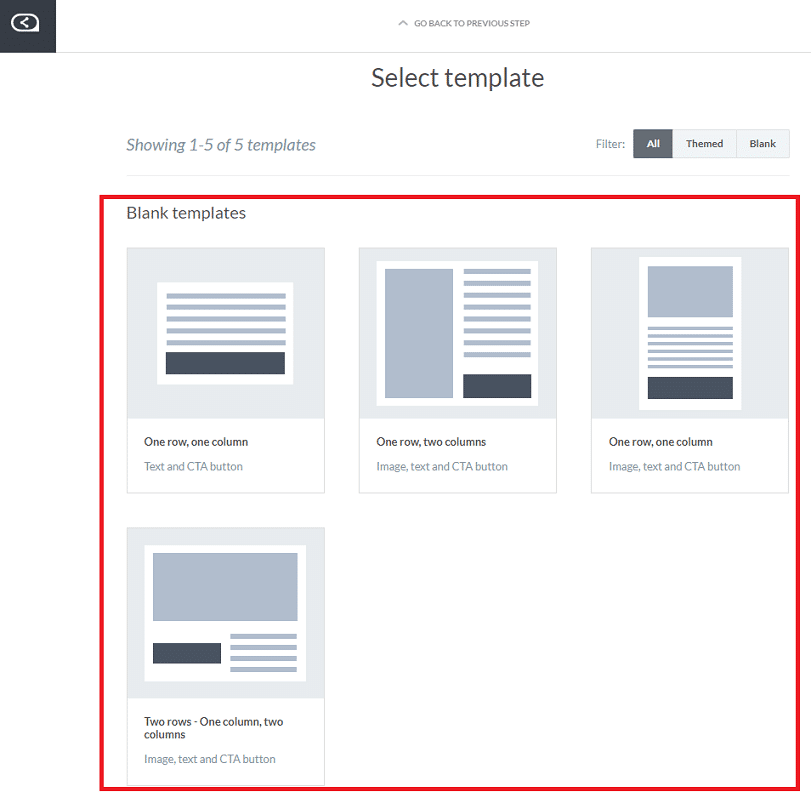
4. You will now need to choose your template for the Sleeknote. You have four options to choose from. Select the one that fits your design and proceed.
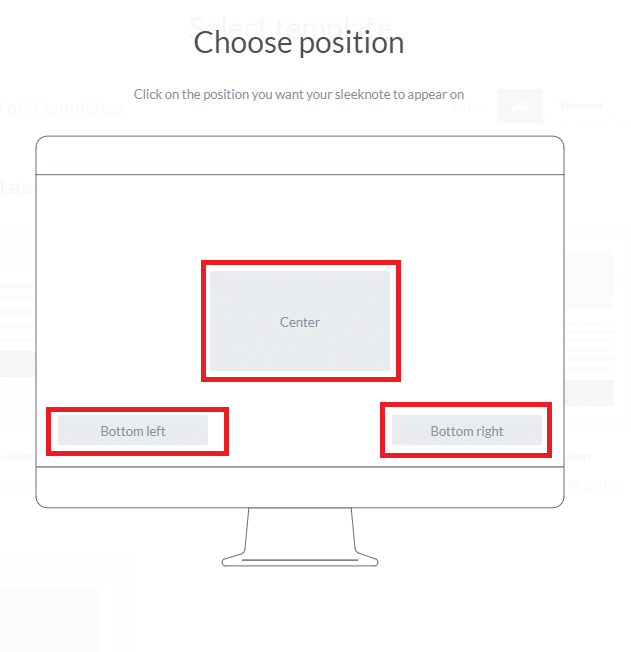
5. You will need to choose the position you want the Sleeknote to appear on your webpage. They demonstrate where they will pop up for you, so pick your favorite and continue.
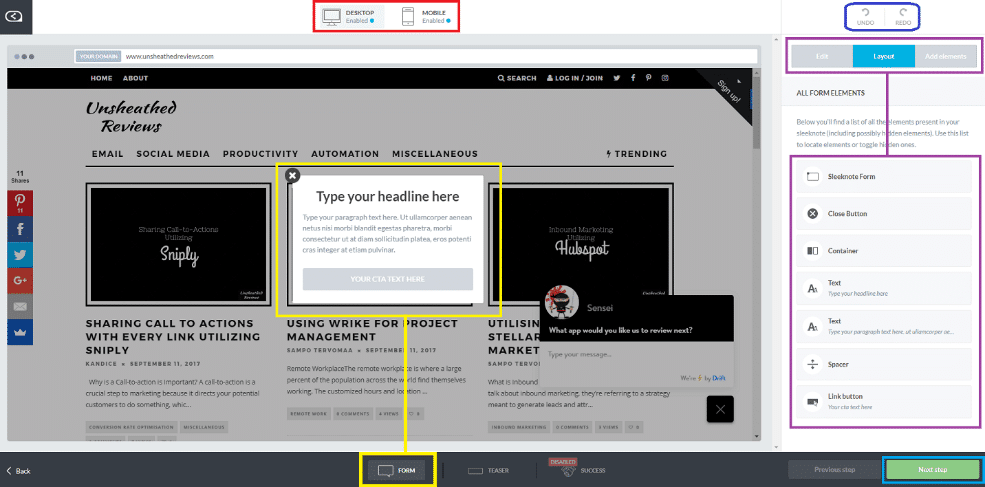
6. On the editor, you can now edit your headline, edit the text, choose the design, and edit your call to action. On the editor, you can also see what your design will look like on a website and on mobile devices. When ready to move on, select next step.
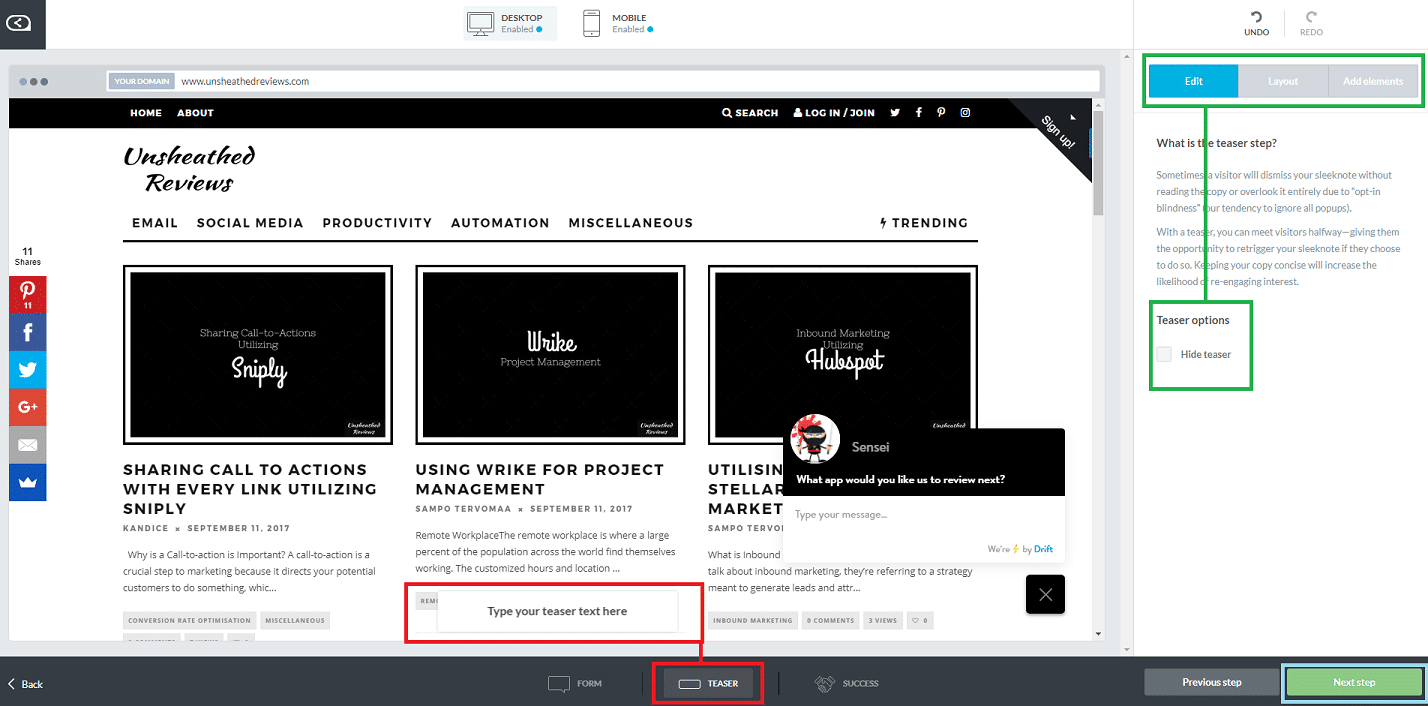
7. Next, you can choose to disable the teaser if you want, or you can click on the text and edit it. Once you finish, select the next step to continue.
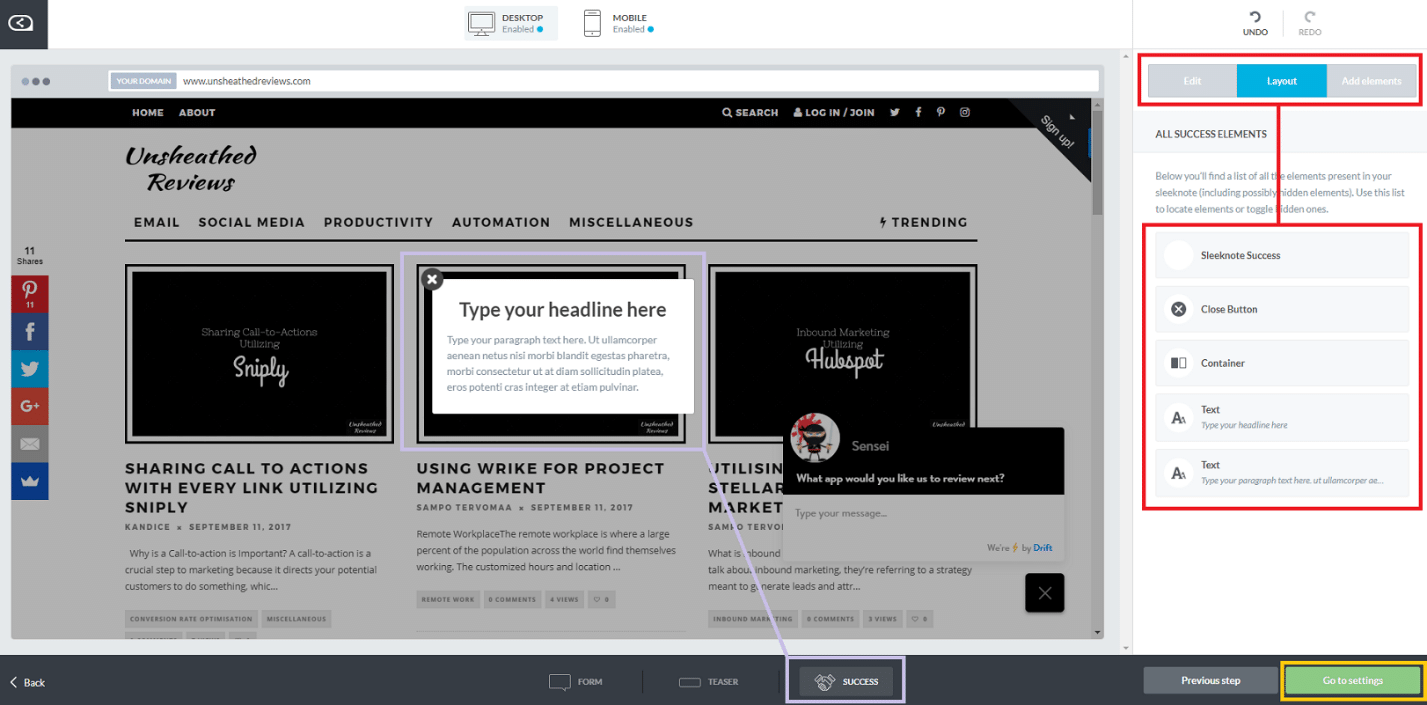
8. This is the success button, for when they sign up, buy your product, etc. You can thank them, give them tips, or anything you think is appropriate for your audience. Once you edit the text, you can edit the layout and design. When you are finished, select go to settings.
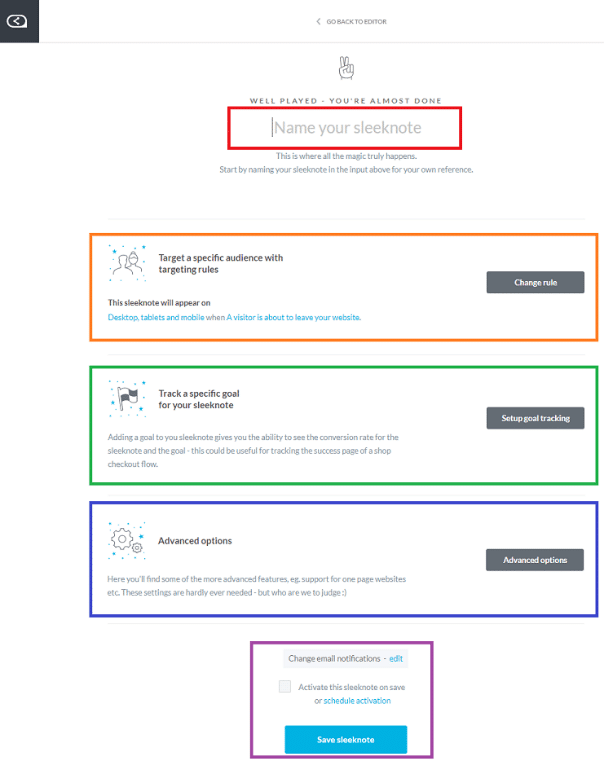
9. On the settings page, you will need to name your Sleeknote, choose an audience to target, track a goal you created, choose from advanced options, select to activate now, schedule it, or leave it disabled. Lastly, just select the save Sleeknote button.
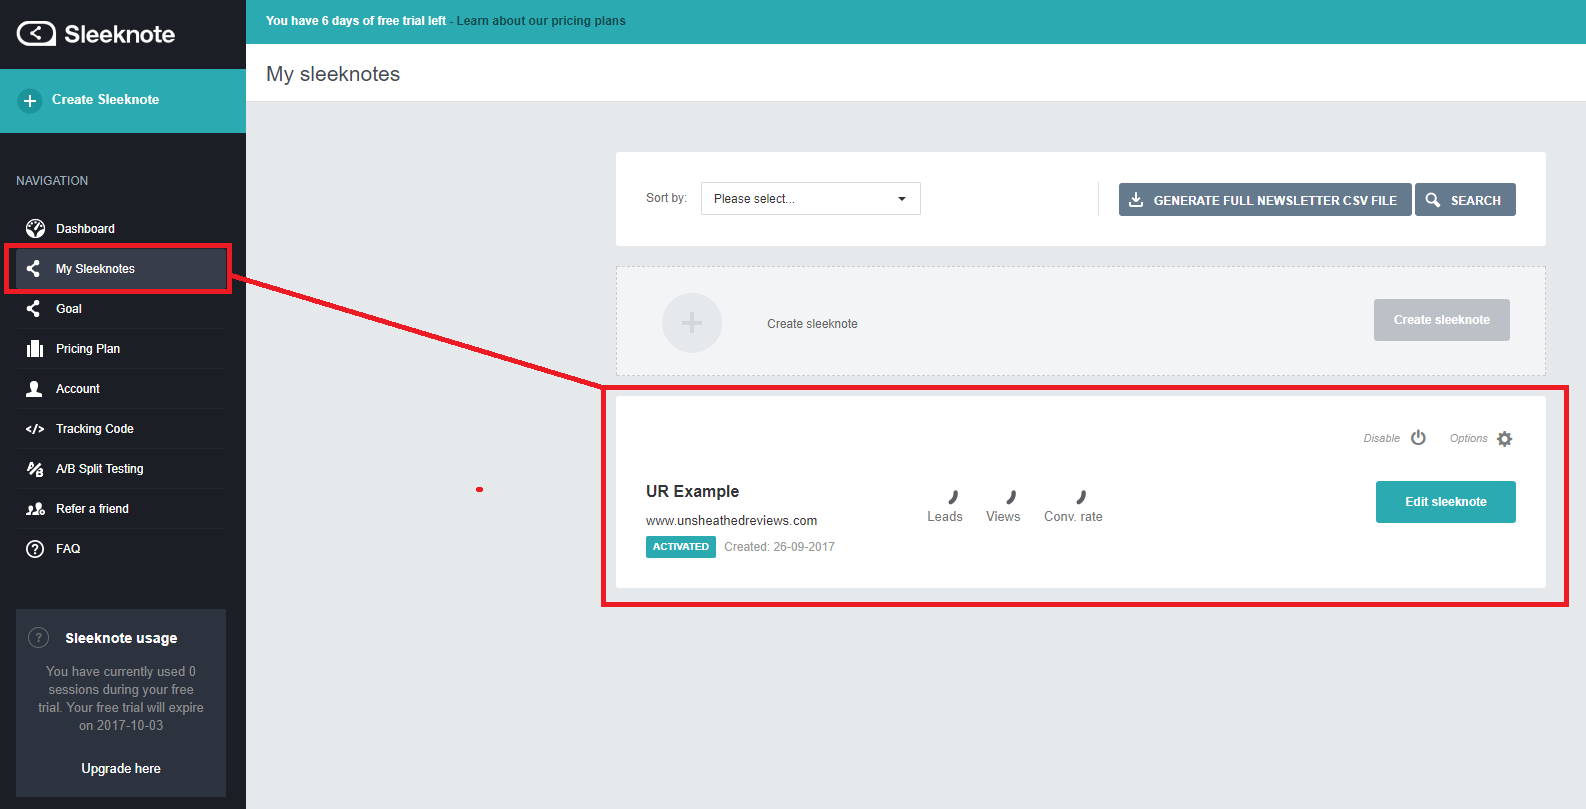
10. You will return to your Sleeknote dashboard where you will see the Sleeknote you just created. You have now finished setting up a lead capture form for your website.PAGE_BREAK: PageBreak
Creating Goals
I do like that Sleeknote has built in the process of making goals and monitoring them. This is a terrific way to set achievable goals, accomplish them, and complete your tasks.
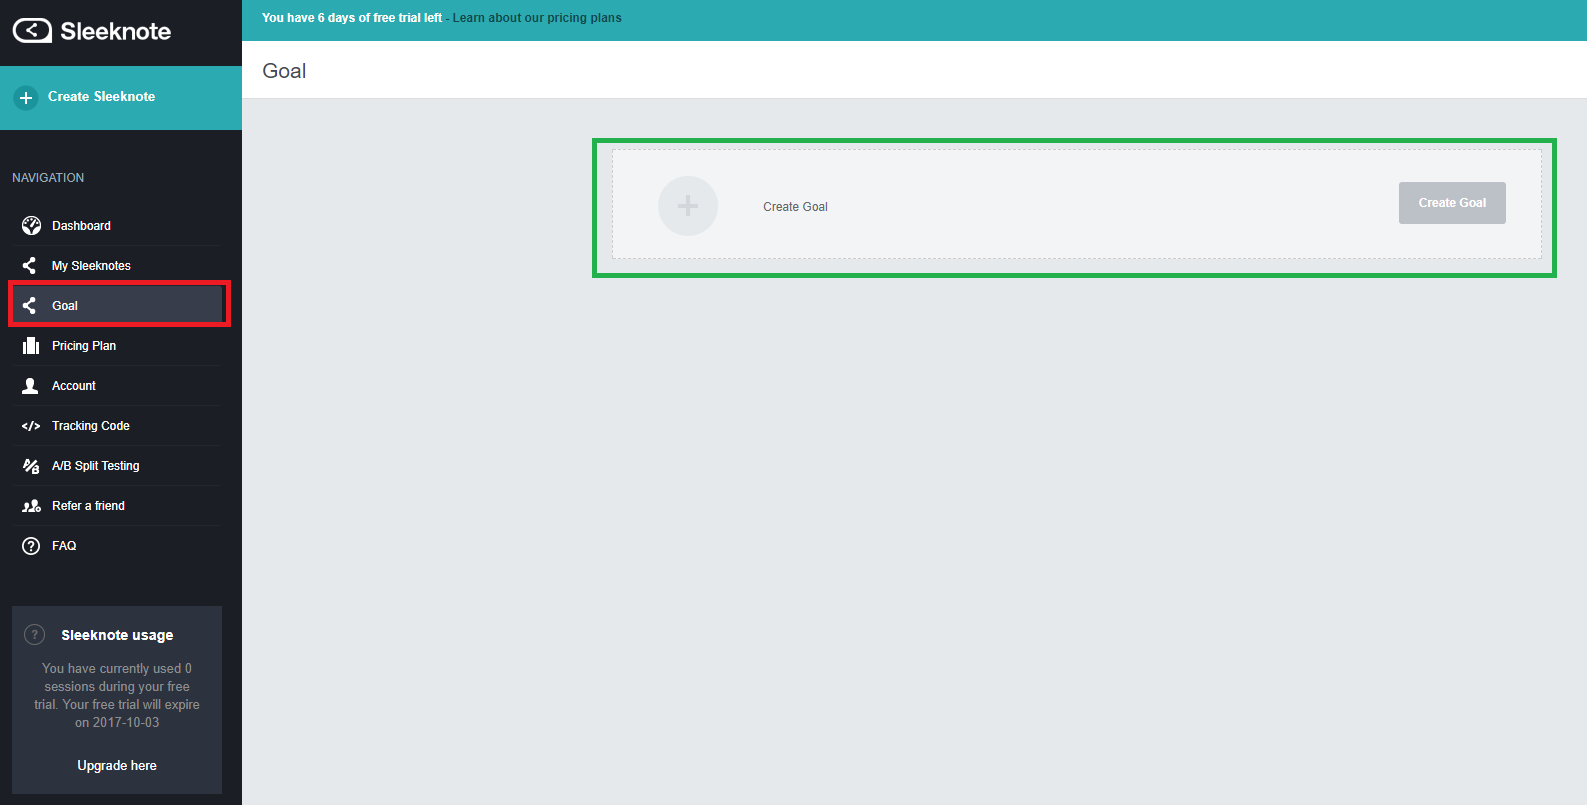
To make a goal, select Goal in the navigation panel. On the goal dashboard, select create a goal.
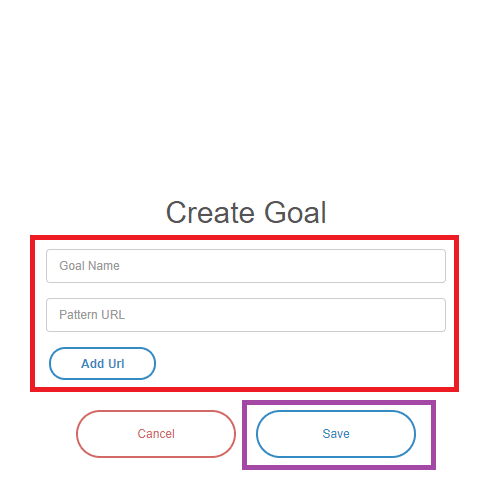
The create goal popup will appear. You will need to enter the name of your goal and the pattern URL for this goal (it cannot be a homepage). Once you are finished, select save.

You have now created your goal. Here you can see the title and the conversion rate on your site as well as have the ability to edit your goal or delete it.
A/B Split Testing
I usually don’t like to mess with A/B testing because I don’t like creating multiple templates on some platforms. However, with Sleeknote, it’s very easy to create multiple forms in minimal time.
I created another form, for the same website. When doing a split testing on Sleeknote, it must be done on the same website.
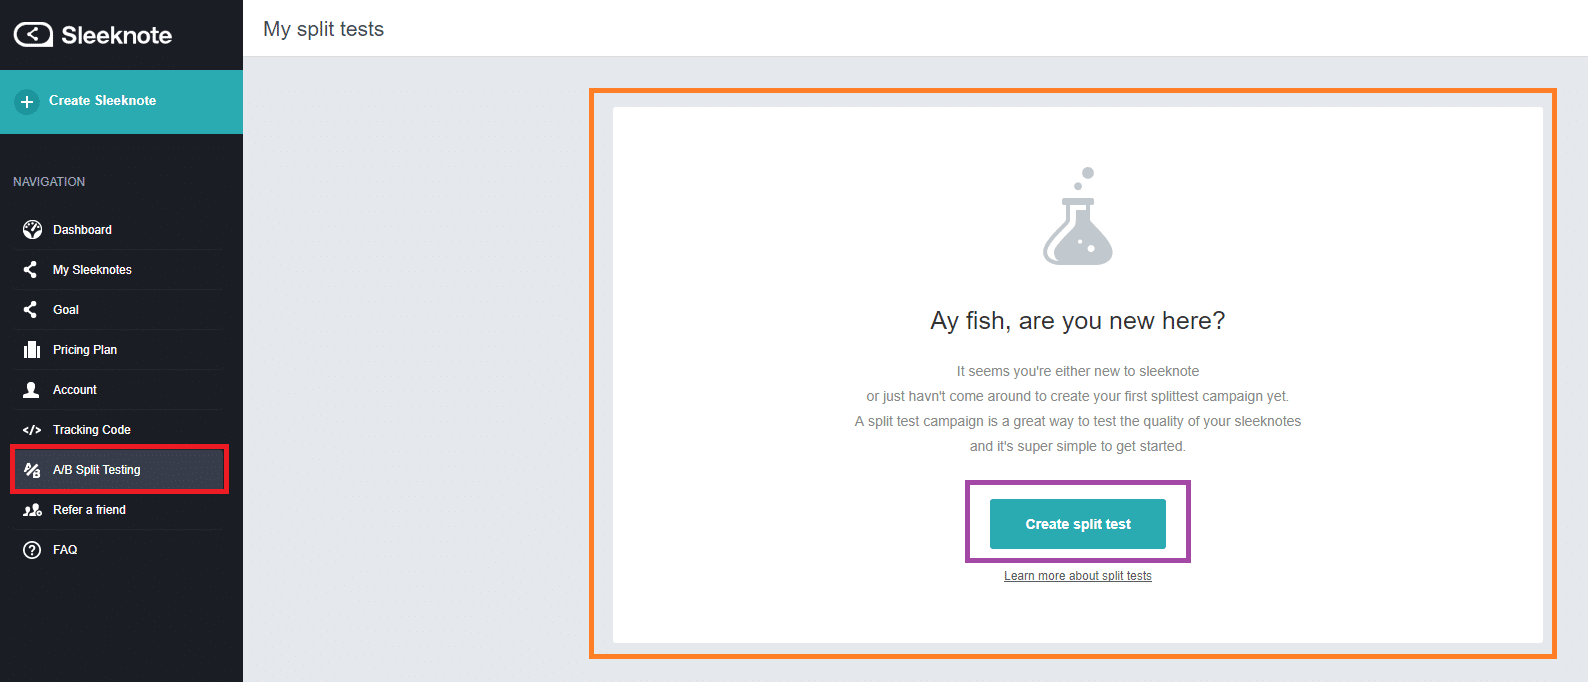
Select the A/B Split Testing in the navigation panel. Then select create a split test to continue.

On this form, you need to fill out the name of your test, and then select your first form to test and your second form to test. When you finish these three things, select save & activate the campaign.
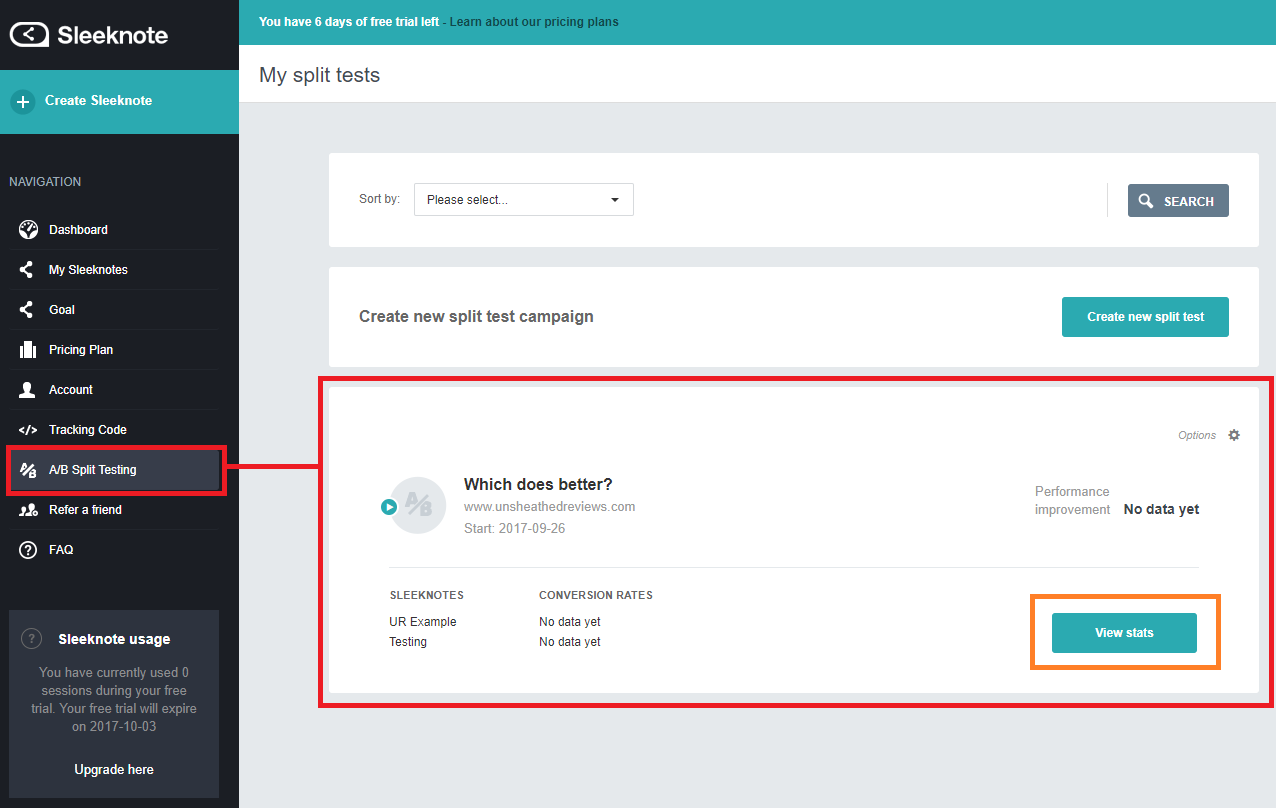
You will return to the A/B Split Testing dashboard where you will see the test you just created. While there is no data on my test yet, you can now click view stats.
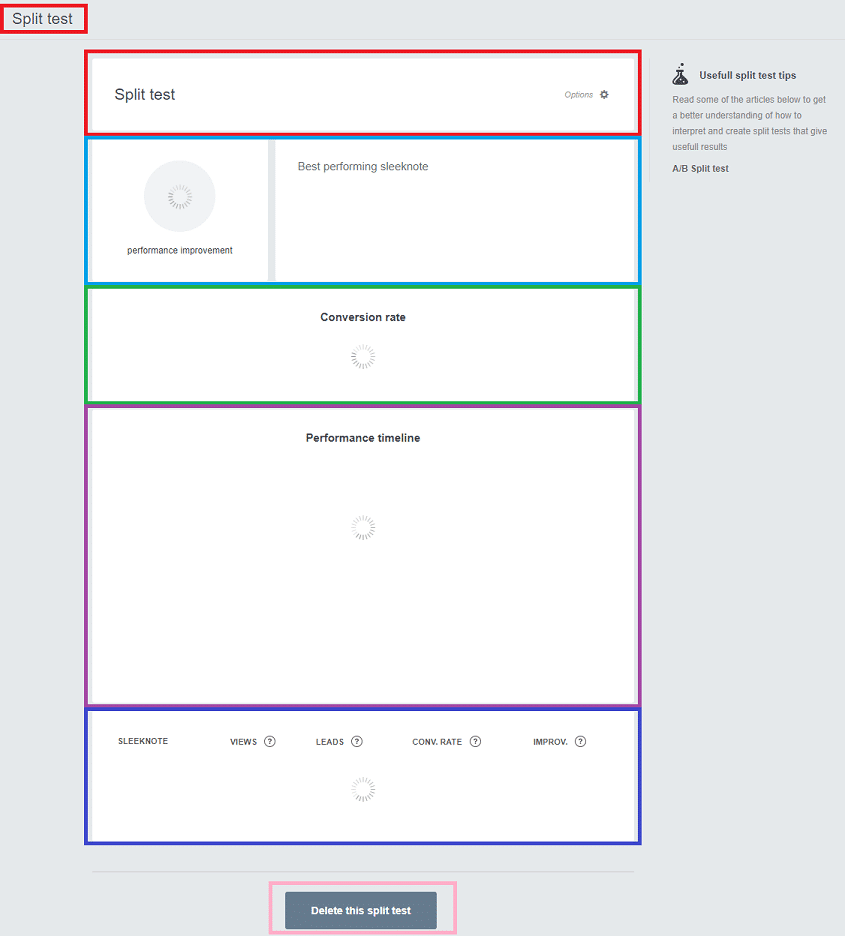
You won’t see any stats right away, but I do want to show you what you can expect to see. From a split test, you’ll get to see the performance of the forms and which performs the best, the conversion rates, the performance timeline (so you can see what does better when), and the regular stats like views, leads, and improvement.
CONCLUSION
Overall, I find Sleeknote to be easy to use, simple to navigate, and straightforward with their editing and creating of forms. I like the simplicity of the designs, and that I didn’t need to be an amazing designer to feel like I could use this program.
This service is definitely great for beginners, those not good at designing, and for those looking for a simple design.
The price is a lot to invest in right up front, but if you use the seven days and you see a huge improvement with your leads, conversions, and sales – then I’d say it’s a worthwhile investment.