About Salesforce Pardot
Salesforce Pardot is an email marketing automation platform that allows you to automate your email campaigns and build your leads.
This service uses an Einstein AI system that learns over time and interaction how you use your campaigns, what your leads open and don’t, and how to help you perform better.
They offer you:
- Email marketing automation
- Marketing Campaign management
- b2b marketing
- Lead generation services
- Analytics and report data
- Marketing resources
- Webinars and events
- ROI calculator
- and much more…

HOW PARDOT WORKS
Using an Einstein AI automation system allows you to build your product and over the course of emails being sent, updated content being sent out, and you managing your campaign, the AI learns how you work, what your leads do and don’t like, and how to better your performance and statistics. Your marketing team will be able to focus on lead nurturing and inbound marketing a lot more to improve engagement and make meaningful connections.
Pardot considers the individual behind the business and what works best for you and your company. They offer support and inclusive events for you to take part in to learn and understand more about marketing and latest trends in the industry. This tool will help you improve your marketing strategy and create a more refined sales cycle to get individuals and b2b businesses interested.
There is no free trial for Pardot, and their prices start at $1,000 per month up to 10,000 contacts. This is a bit on the expensive side, and I would recommend this option to larger businesses that have established their brand to the public already. Then any engagement campaign would have a better pay-off.
HOW TO USE PARDOT EMAIL MARKETING
Using this marketing automation tool is very straightforward and the system is clean and easy to navigate. I found the website to be very modern and all your pages are organized.
When using Pardot, I found that I had to walk through their tour, rather than create my own products. You can take the tour yourself, but the tour lasts about 1.5 hours – so you’ll want to give yourself enough time to do this, or you can let me do it for you and schedule a live demo at the end!
On the tour, I’ll focus on nine of the areas they allowed me to demonstrate:
- Creating Your Campaign
- Creating Your Form & Landing Page
- Adding Your Thank You Content
- Building Your Landing Page
- Add Emails
- Conduct Tests
- Designing Your Campaign
- Testing Your Campaign
- Send Emails
- View Your Reports
Let’s get to it!

Creating Your Campaign
Starting to build a campaign from the beginning can seem like a daunting task, however, with Pardot – they have a demo that walks you through their very simple setup.
What I found while creating my campaign was that the forms were easy to understand and it had everything lined up for you to just click and enter.
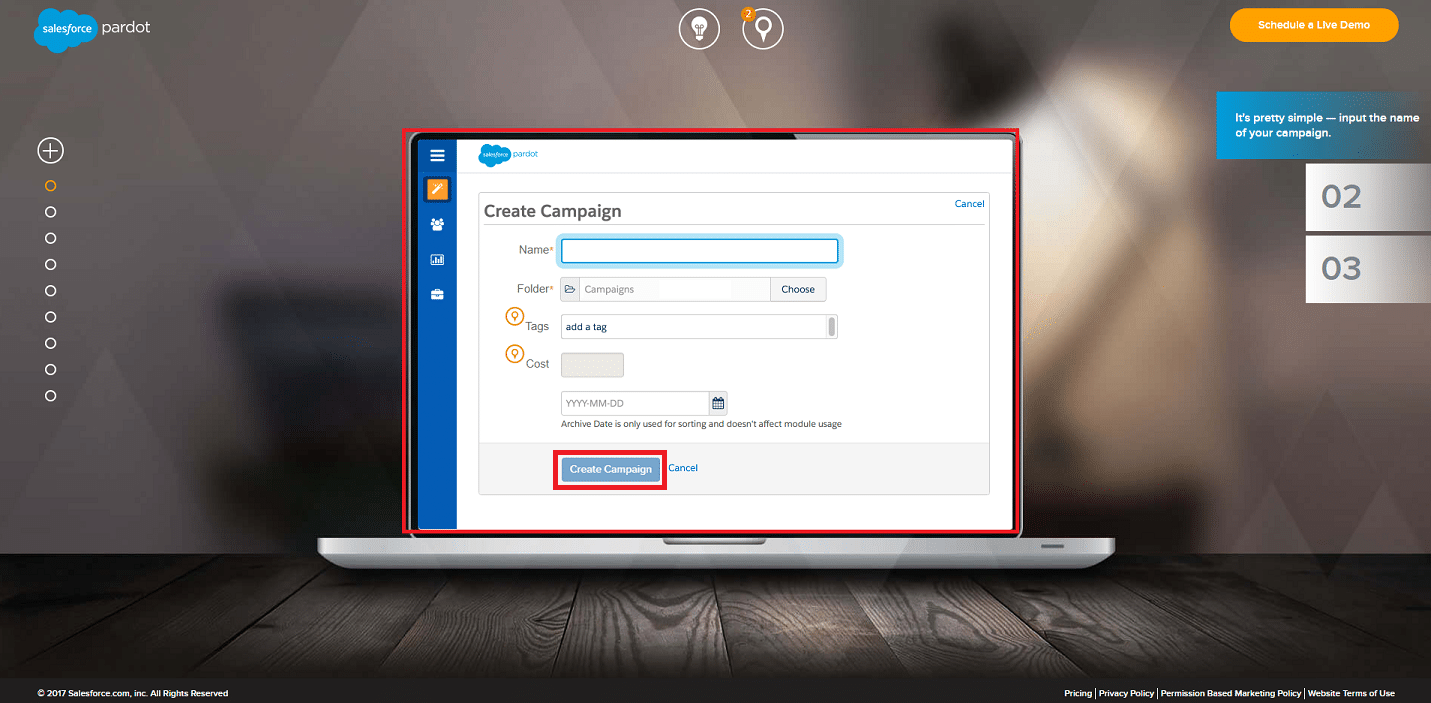
When creating your campaign, you’ll need to enter the name of the campaign, choose a folder (if you want it in one), the tags, the price, and then select create campaign.
After you select create, you are finished with this step! The first step is always the easiest – or is it supposed to be the hardest?
Creating a Landing Page & Form
Sometimes, we might not know what our landing pages and opt-in forms should look like; Pardot has you covered.
They provide the forms, the designs – everything, to make sure you’re giving your best.
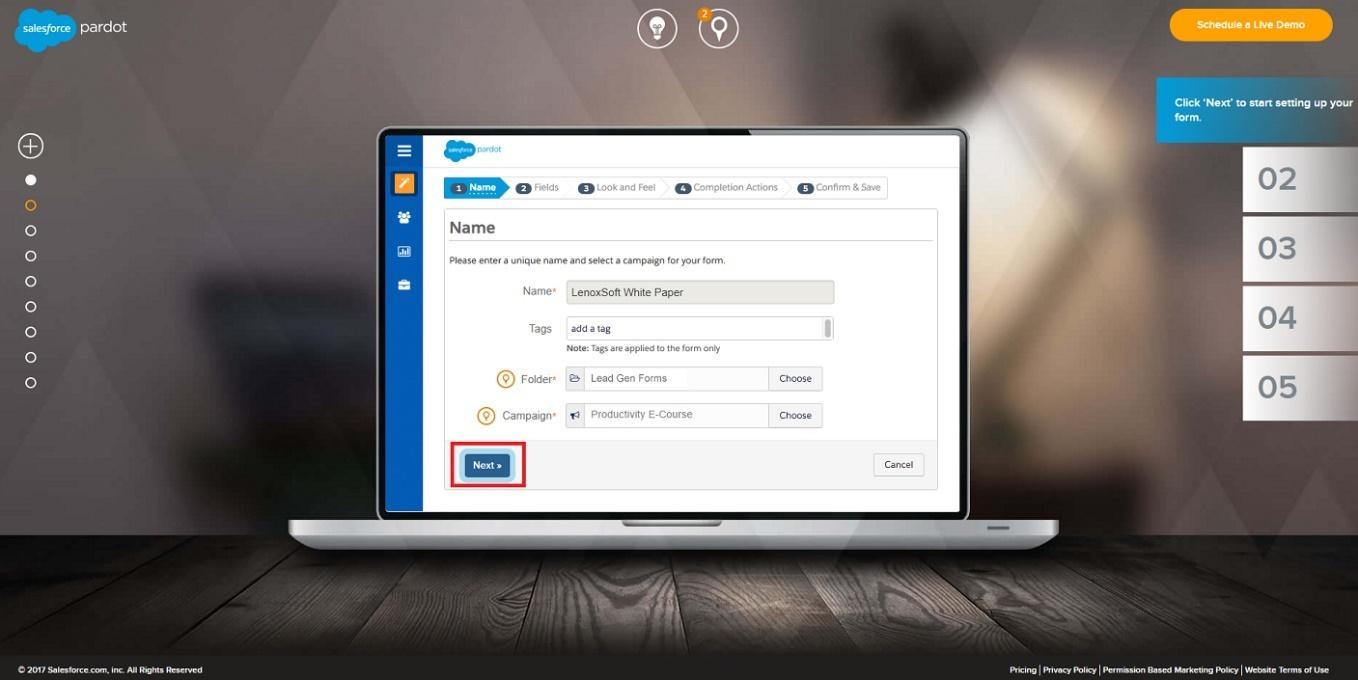
First, you’ll see the design for the form. This is where you can name it, add tags, place in a folder, choose the campaign it goes with, then select next.
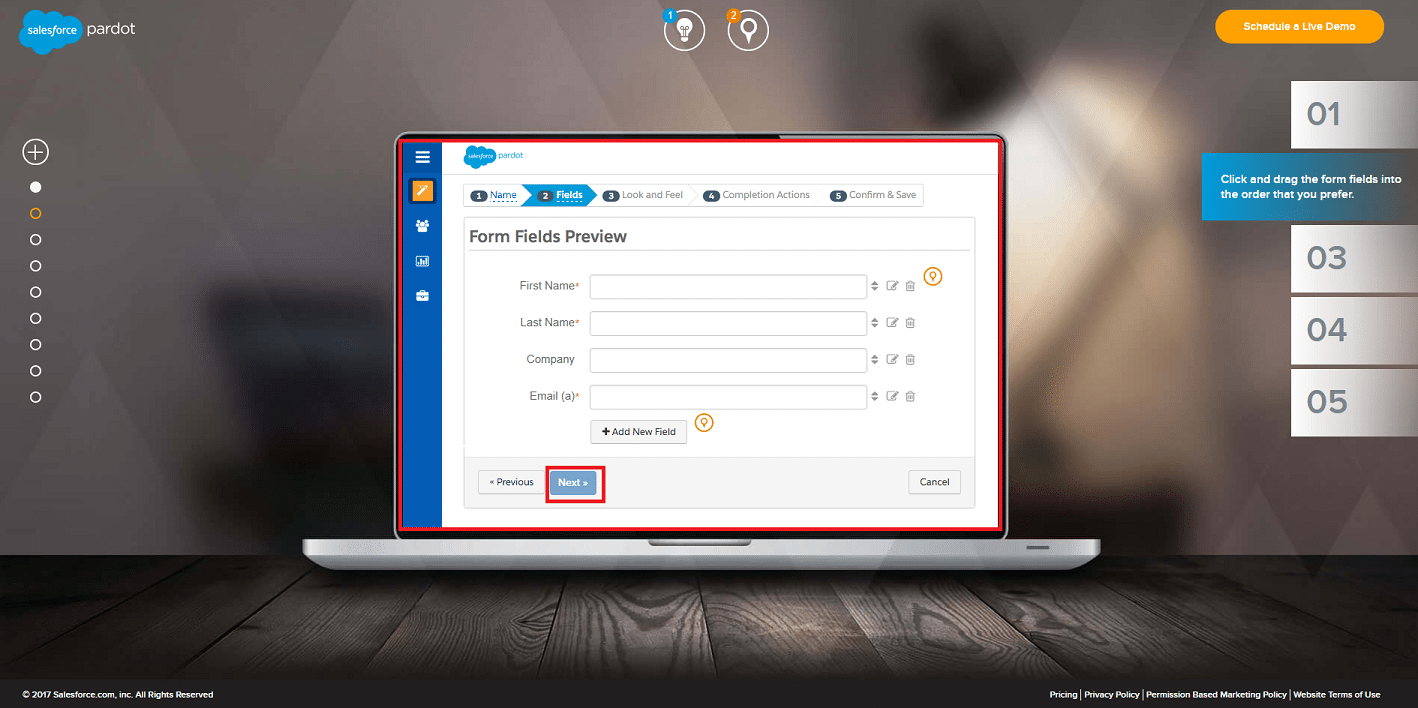
Now, you’ll need to re-arrange the fields, add/delete fields, and then select next when you’re finished.
After this, you can move on to the next step!
Thank You Page
Having a thank you page after an opt-in form really makes your lead feel like you took the time to welcome them and be friendly. It’s also crucial for the connection to stay between you and that lead.
What has been found by marketing studies, is that 65% more leads convert to customers if they’ve received a thank you page after their opt-in form. This is a pretty big deal!
The thank-you page is very simple to create and takes just one minute of your time – well worth it in my opinion!
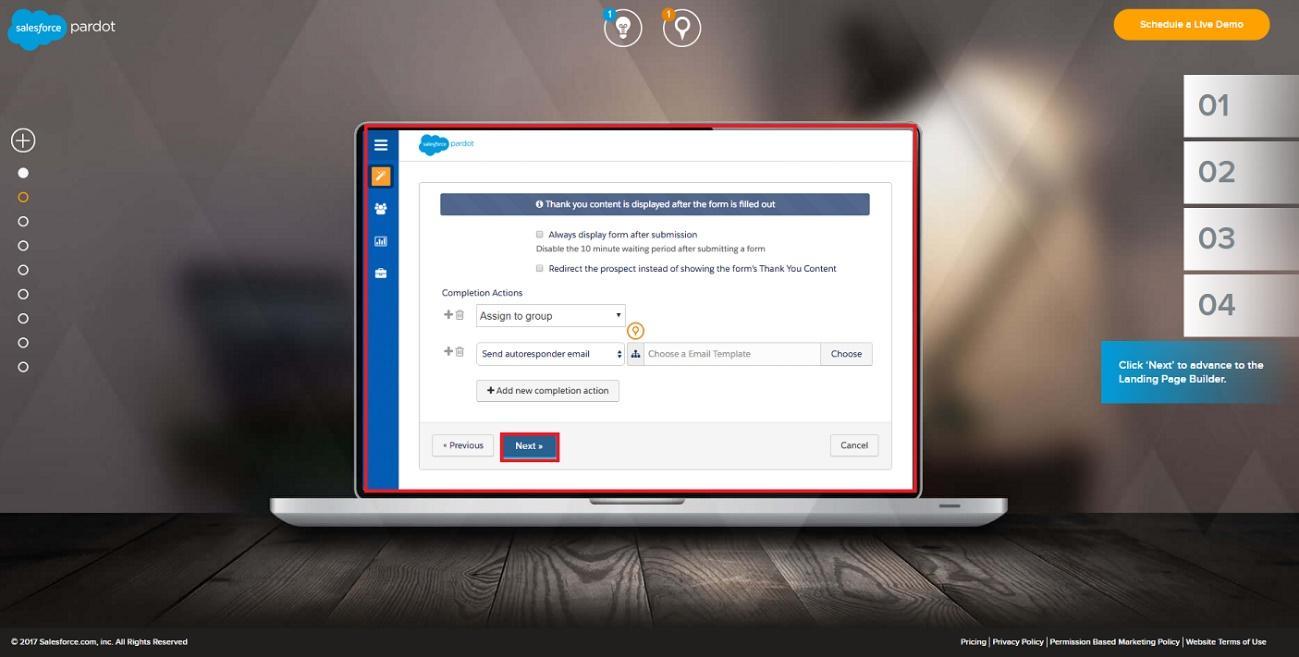
The thank you page allows you to choose your display options, who you assign it to, and if you want to send an autoresponder. After you set this up, select next.
Building a Landing Page
Here’s the creative part, which I love to partake in! Creating a landing page is fun for some, while others really don’t enjoy it.
Pardot understands and has combined designing with minimalist layout to give creative individuals their outlet, but not making the process too overwhelming by offering every design feature and tool known to man.
Designing your landing page can be done in just 5 steps!
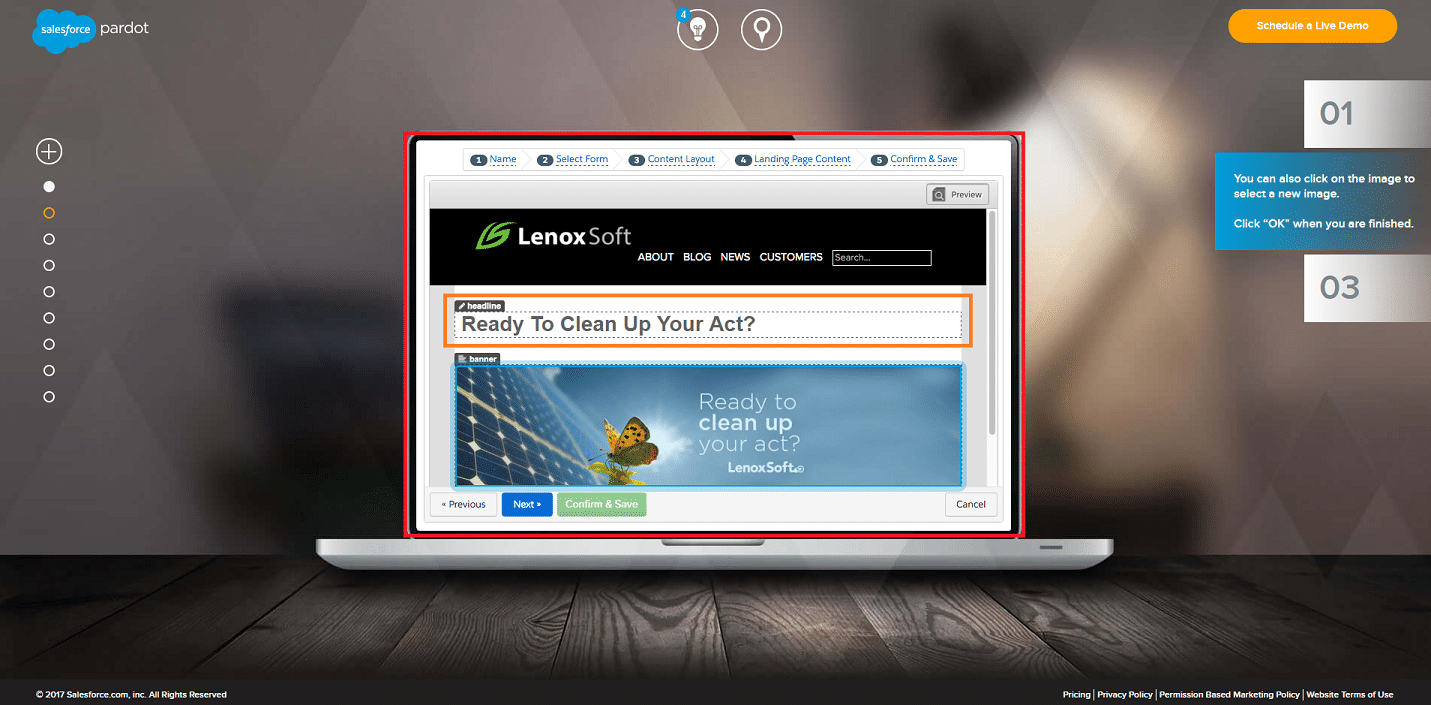
1. Click on the title of your page to edit the text.
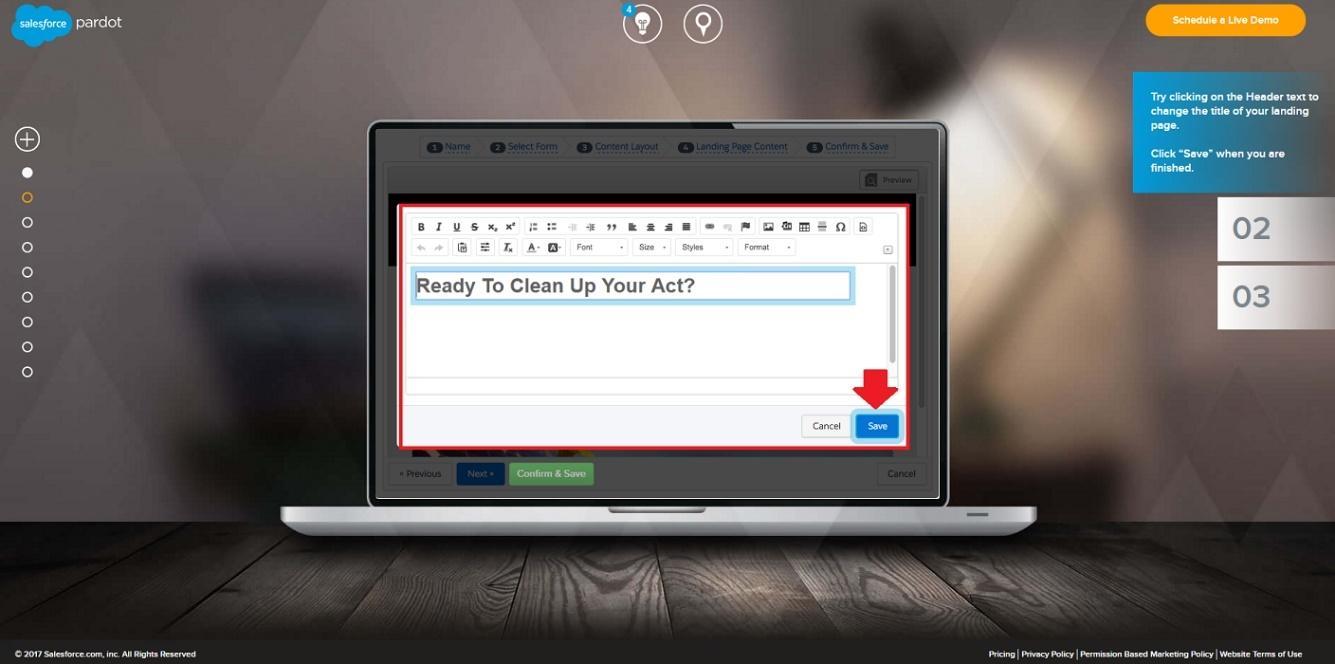
2. Edit the text and type in what you want the title of your landing page to be. When you finish, select save.
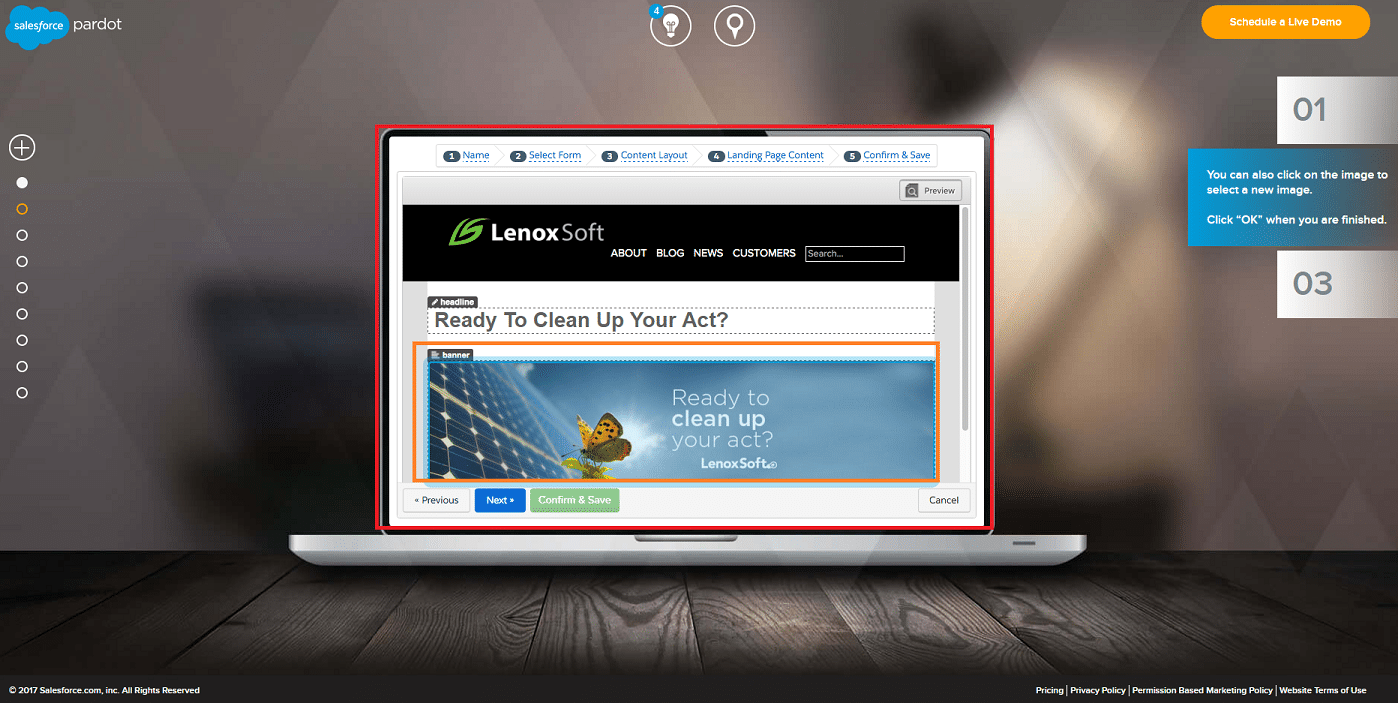
3. Click on the image this time to edit it.
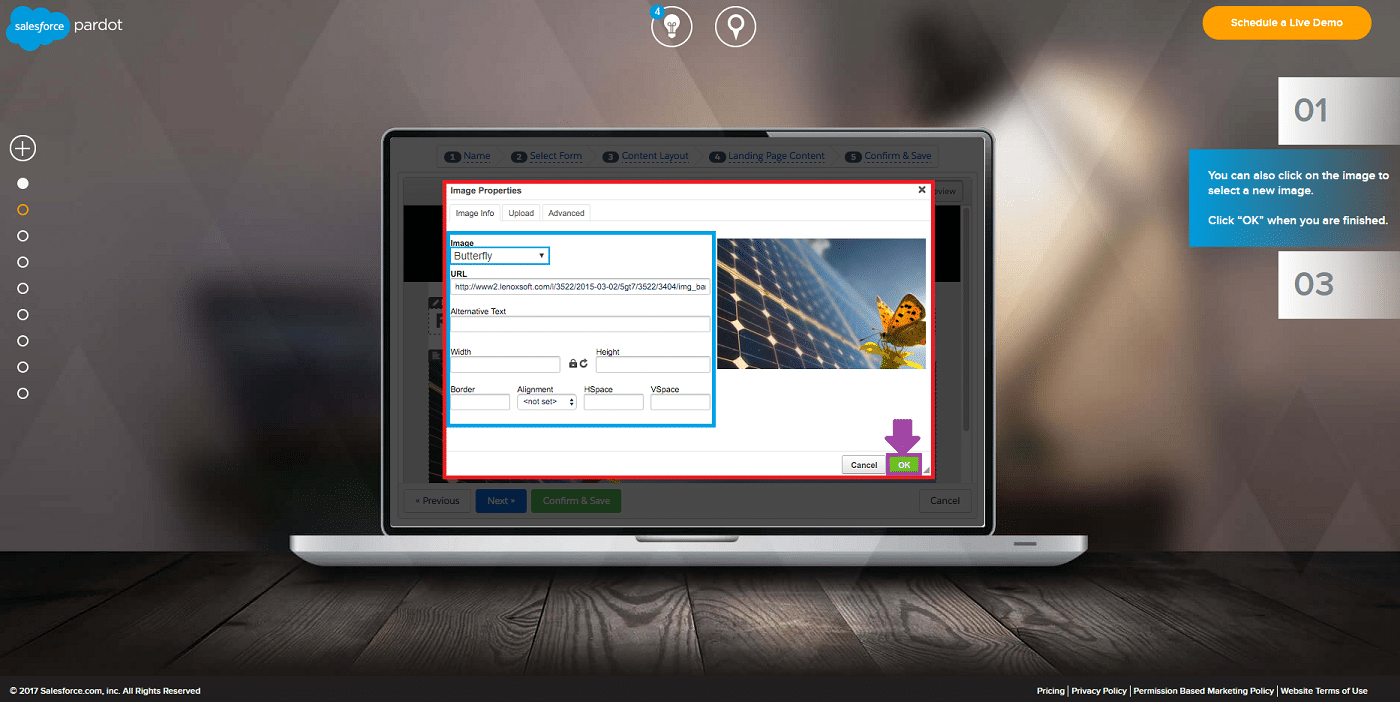
4. You can now select an image from your computer, change the width and height, and other settings. When finished, select OK.

5. After you choose your title and image, you can then select continue & save.
Build Your Email
Building your email doesn’t have to be a week-long process. With Pardot, they have templates for you to choose from and edit to fit your standards and needs.
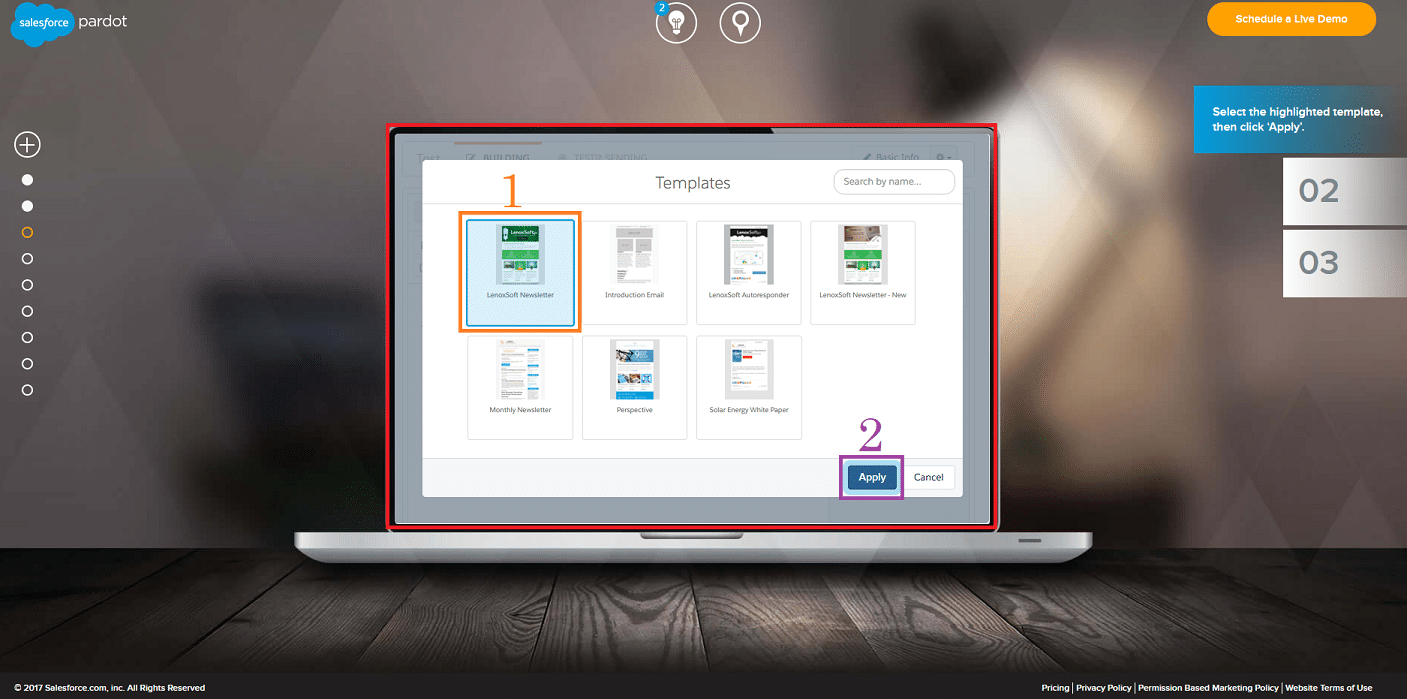
First, you’ll need to select the template design, then select apply.
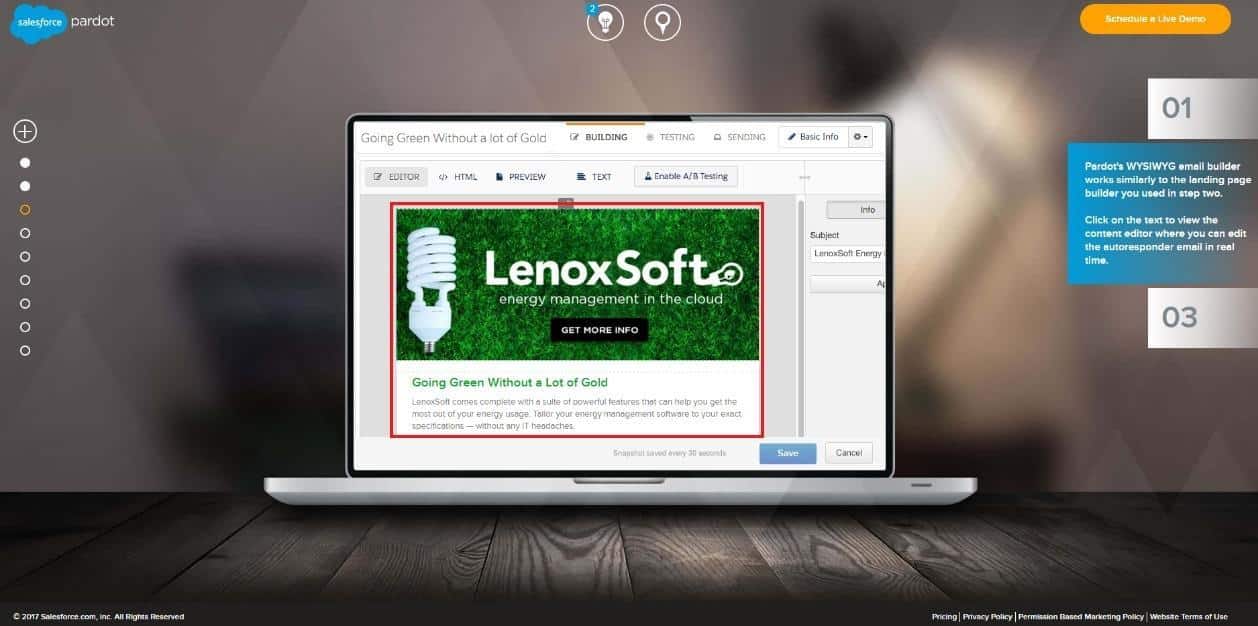
Next, click on the image to bring up the editor.
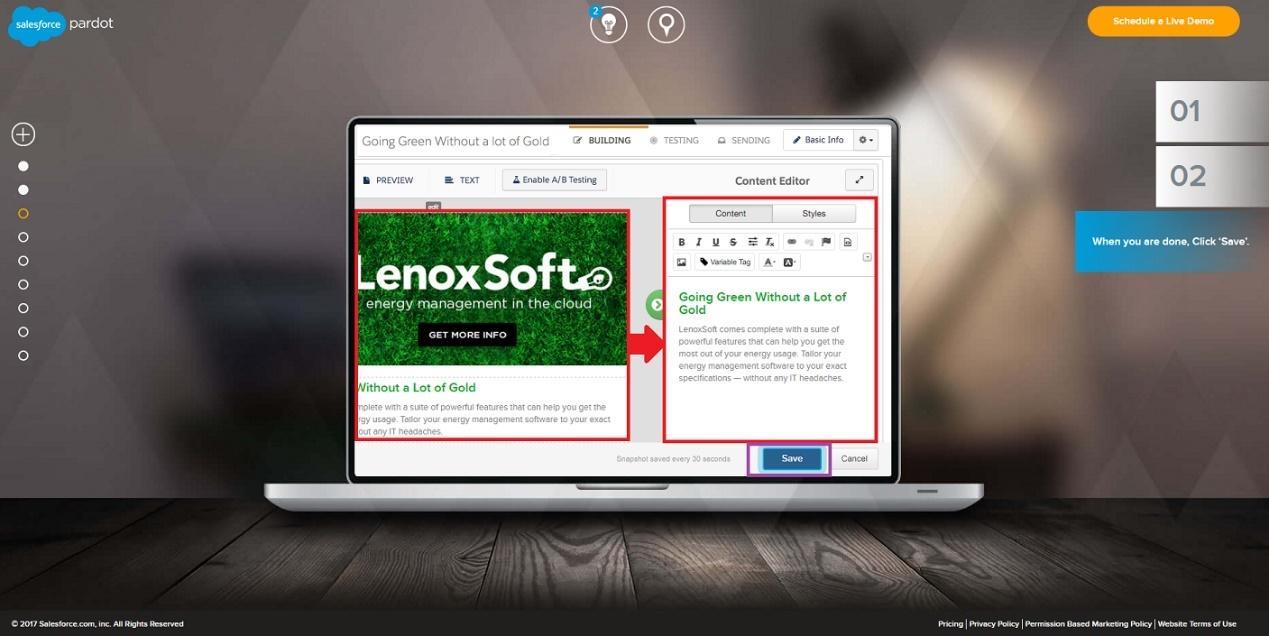
The editor allows you to edit the text for your business. Once you finish, select the save button.
You have finished building your email!
Designing Your Campaign
Designing your campaign can be a huge task, which is why I prefer to lay mine out ahead of time. However, Pardot’s campaign designer is simple to work with and makes it easy to figure out where you want to go. You can create a lot of dynamic content for the customer and have consistent marketing material to fall back on.
Using the designing tools helps you to understand the process and the steps your lead needs to take for you to gain their trust and sell to them.
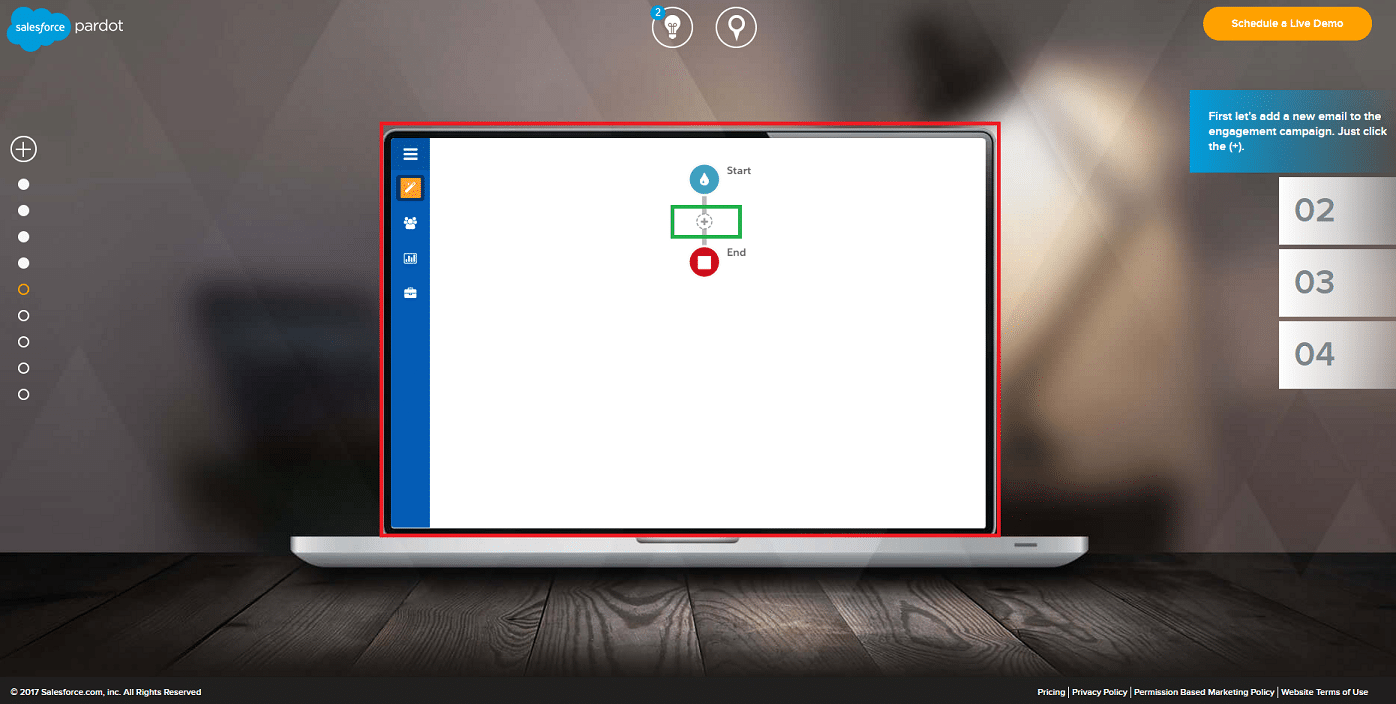
You start with the very basic model, so you’ll want to click on the + sign to begin building.
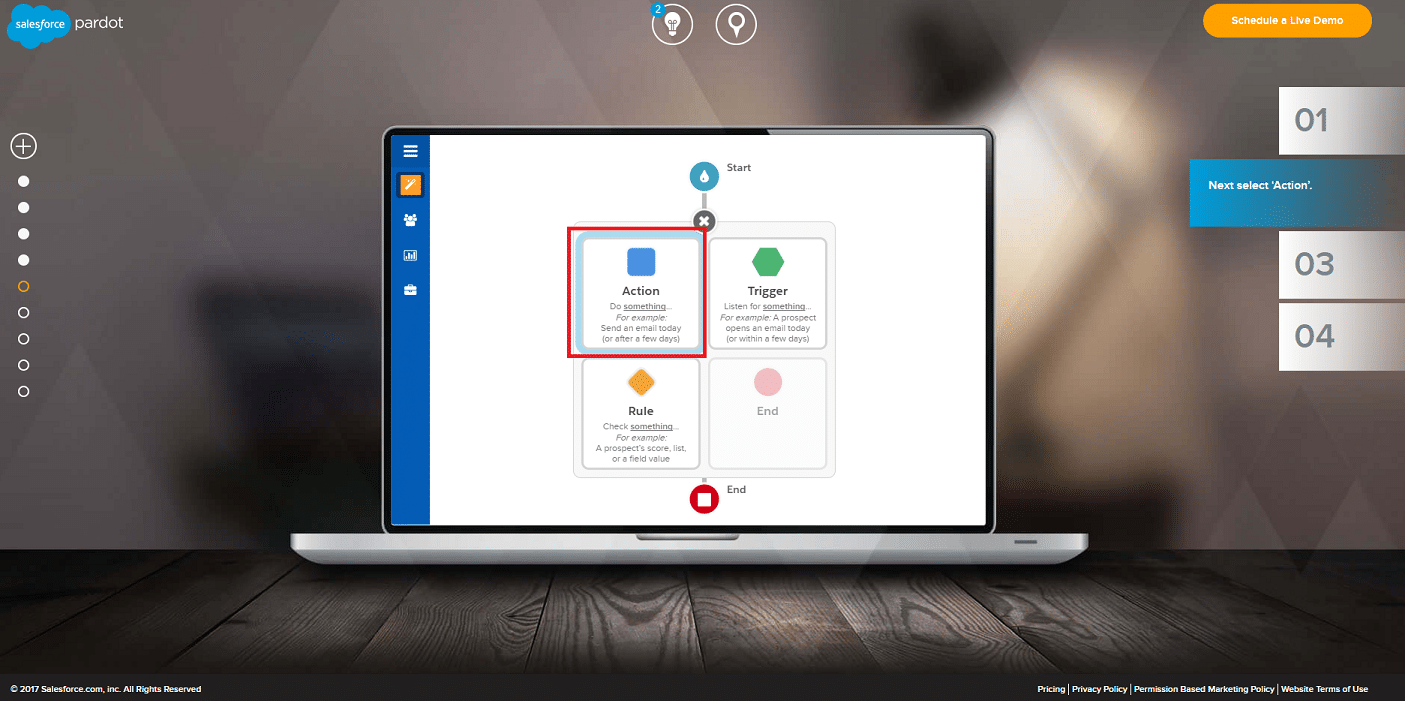
You have four choices, but for the first part, choose the action selection. Then move on.

For the action selection, you have a full list of options to pick. Select the send email option to continue.
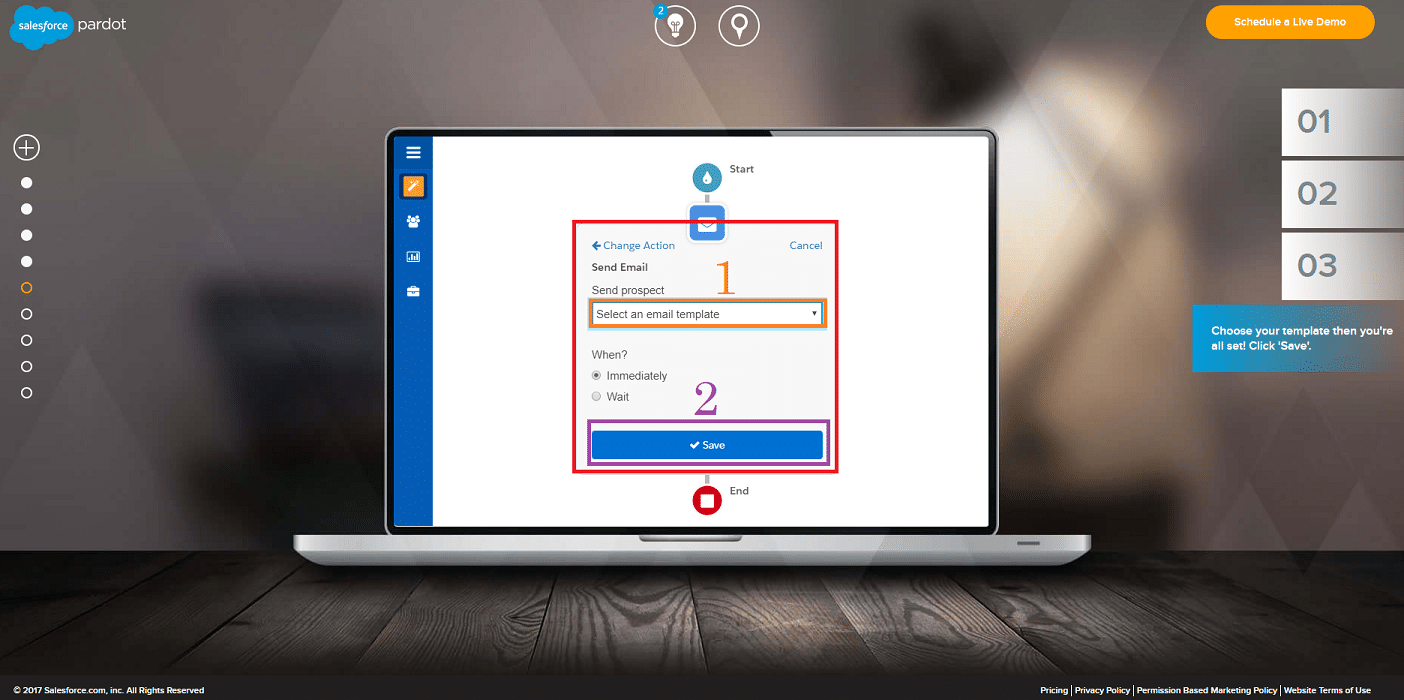
Now, you’ll need to select the email template you created and choose the when option. After this, select save.
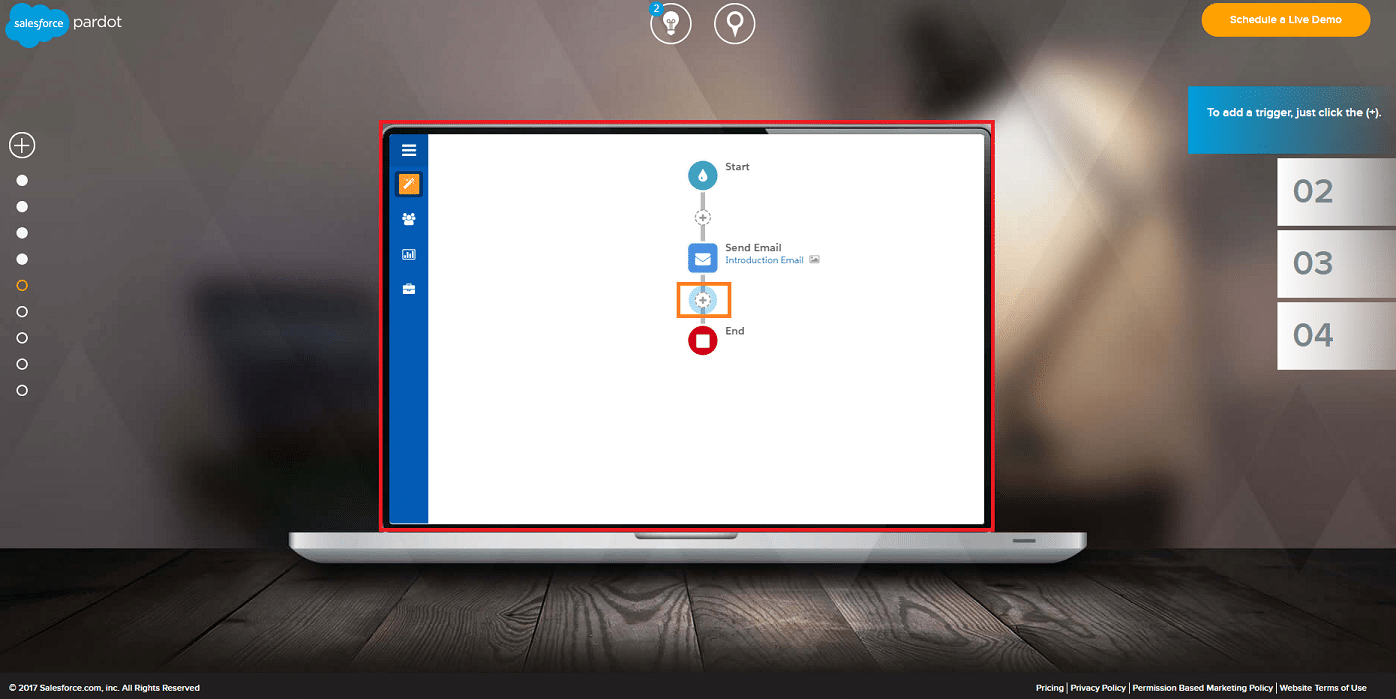
Next, you’ll need to select the + sign to get started on the next path.

Select the trigger option this time.
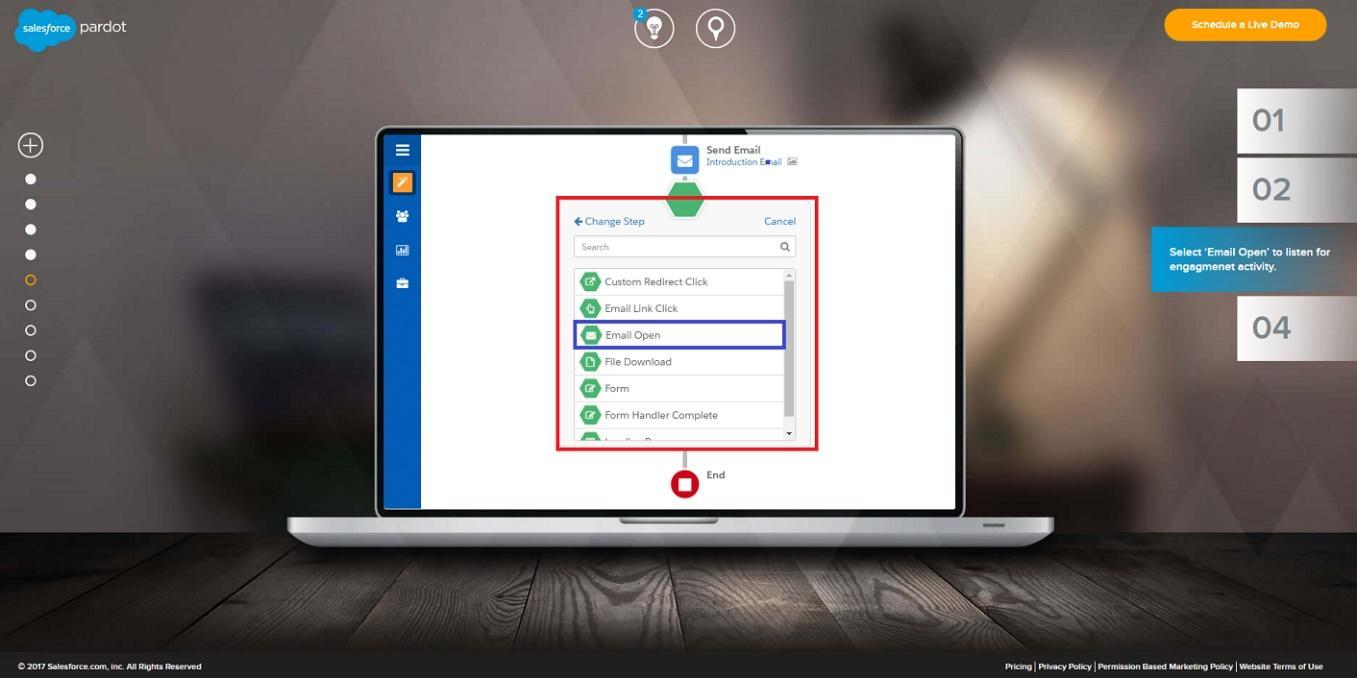
Select the email open option to proceed.
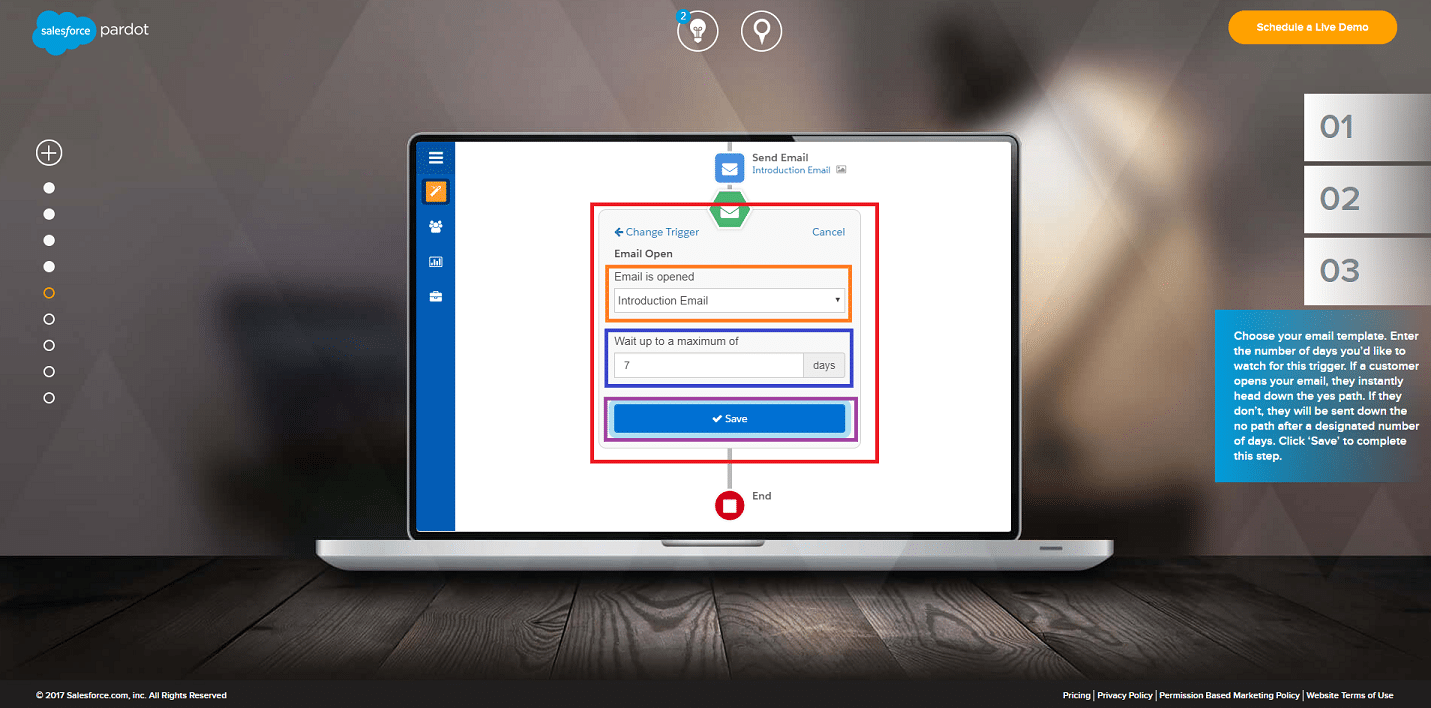
Now you can select the options for the email to open and the days to wait. Select save when finished.
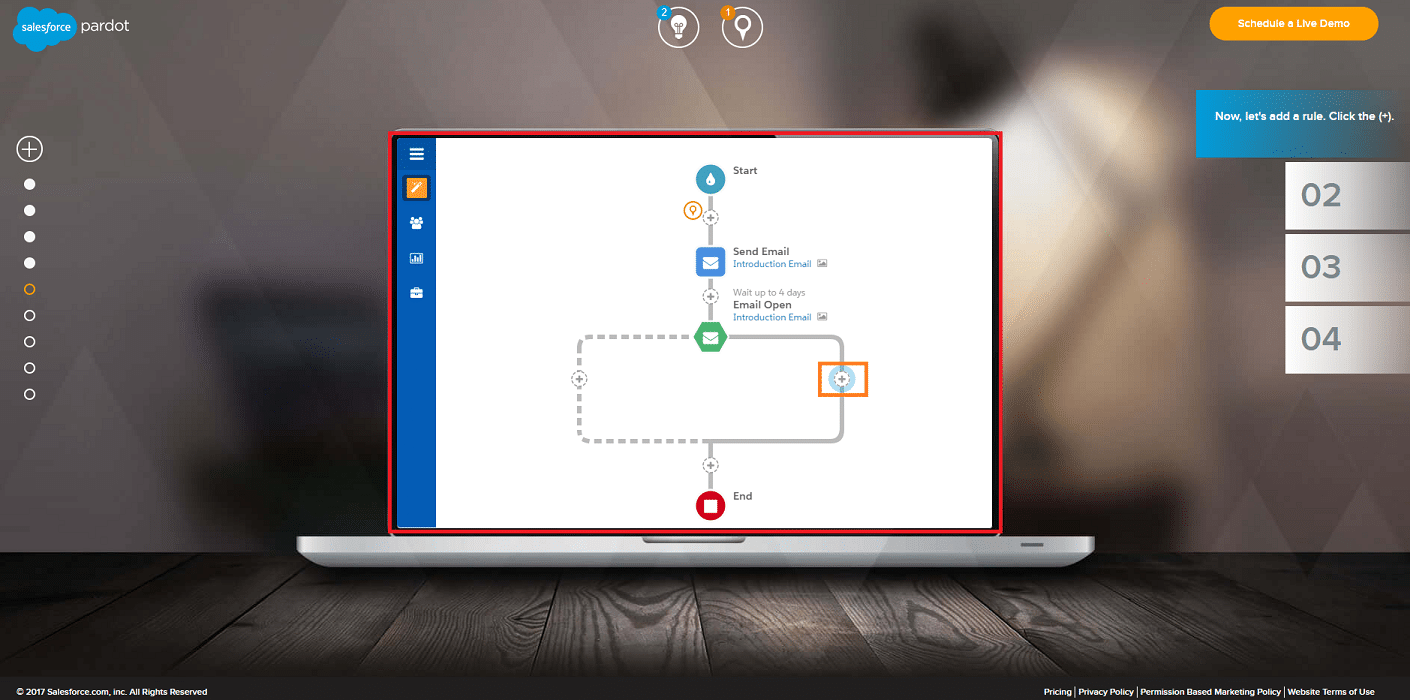
After that, select the + sign once more to add another step.
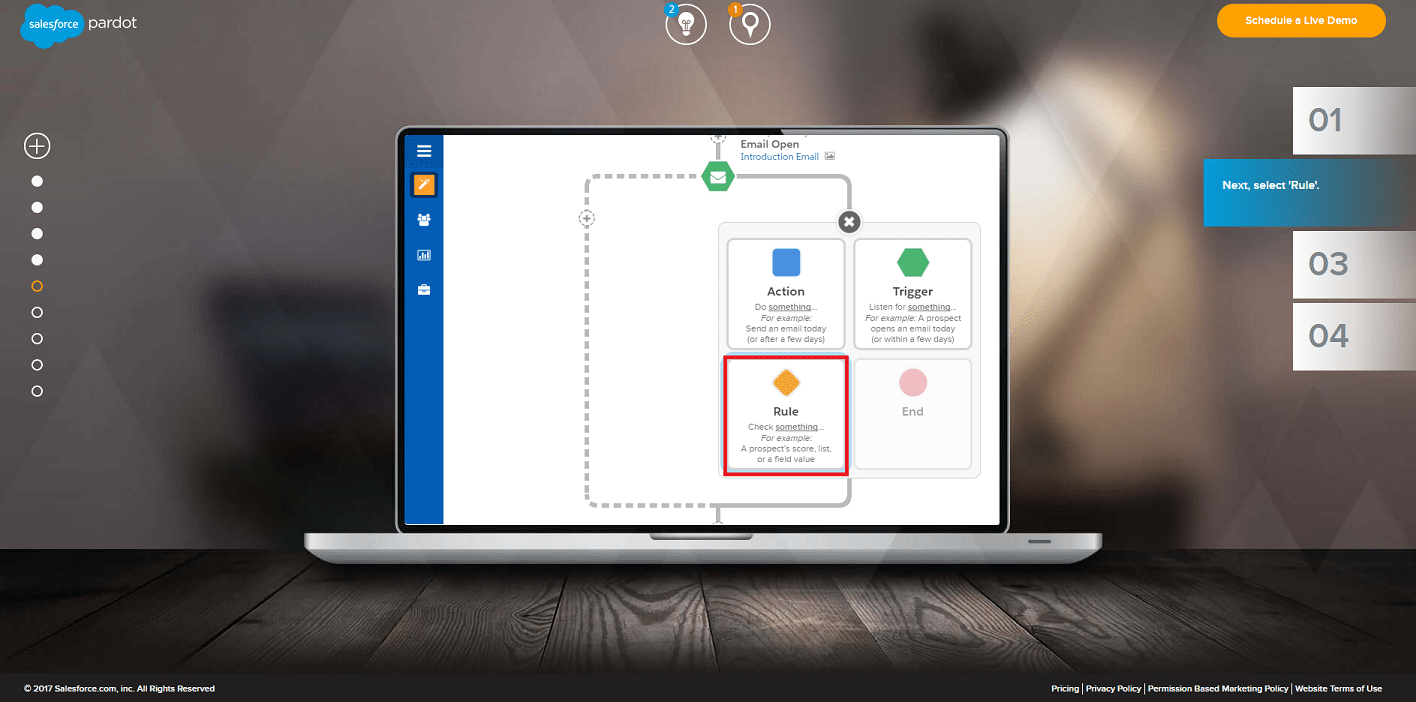
This time we’re selecting the rule option.
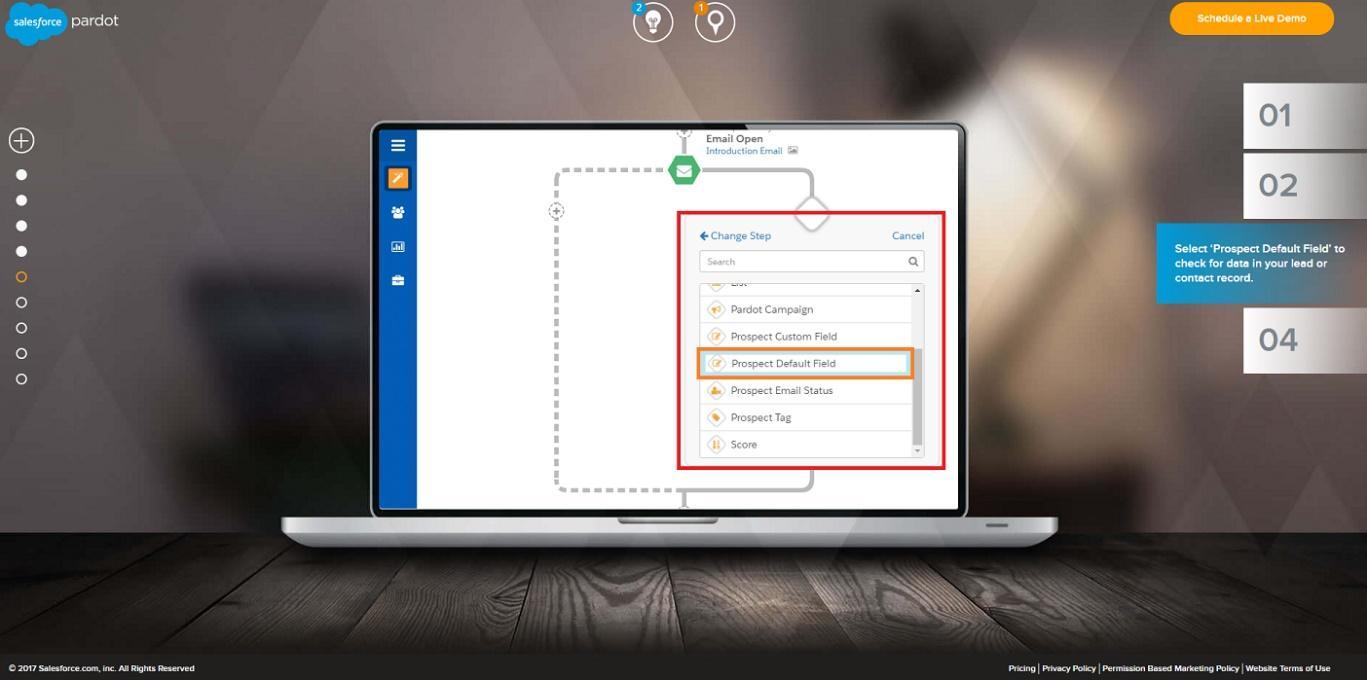
Select the prospect default field.
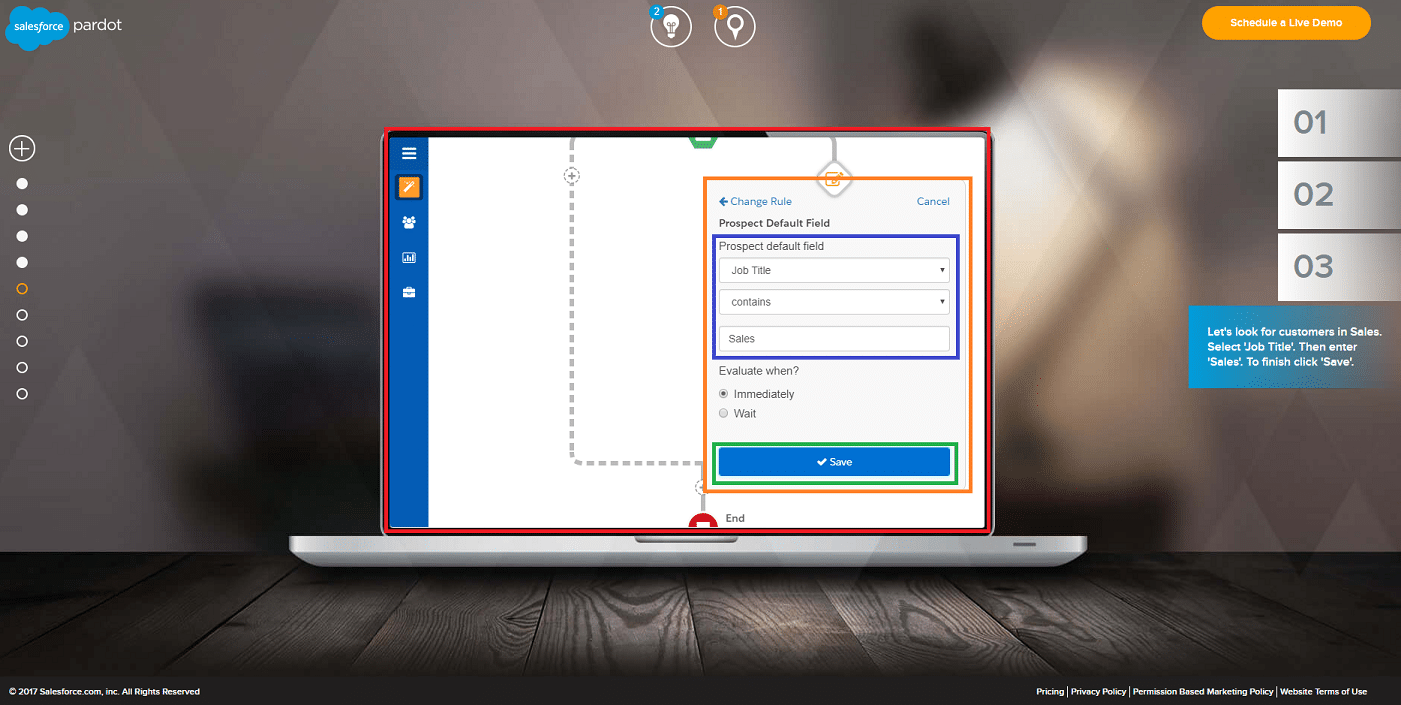
Choose the job title and type in the position you want. Select save.
You have now designed your campaign.
Testing Your Campaign
You always want to make sure your campaign is running smoothly and without errors. The best way to do this, is to test your campaign.
Pardot makes it easy to run a test and make sure you don’t have any missing pieces or bumps in the road.
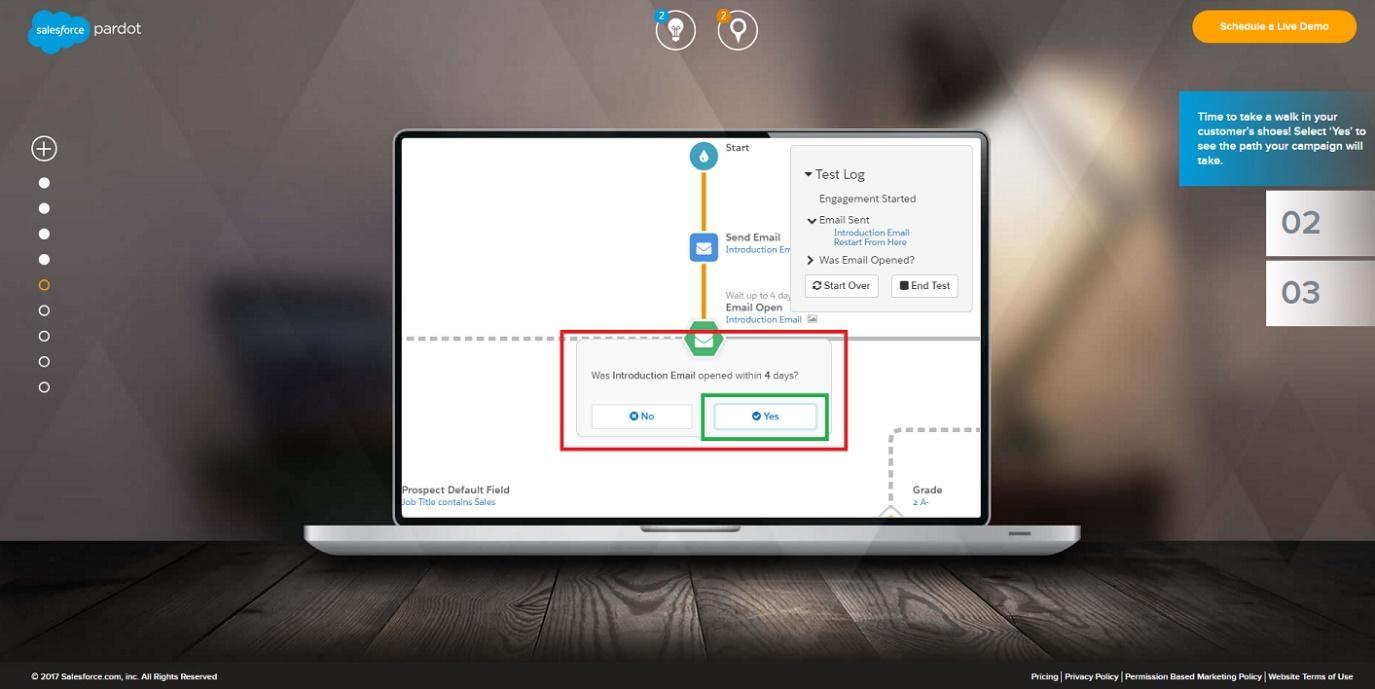
Running through the test allows you to select the pathways of your campaign. Select yes for the email to have been opened.
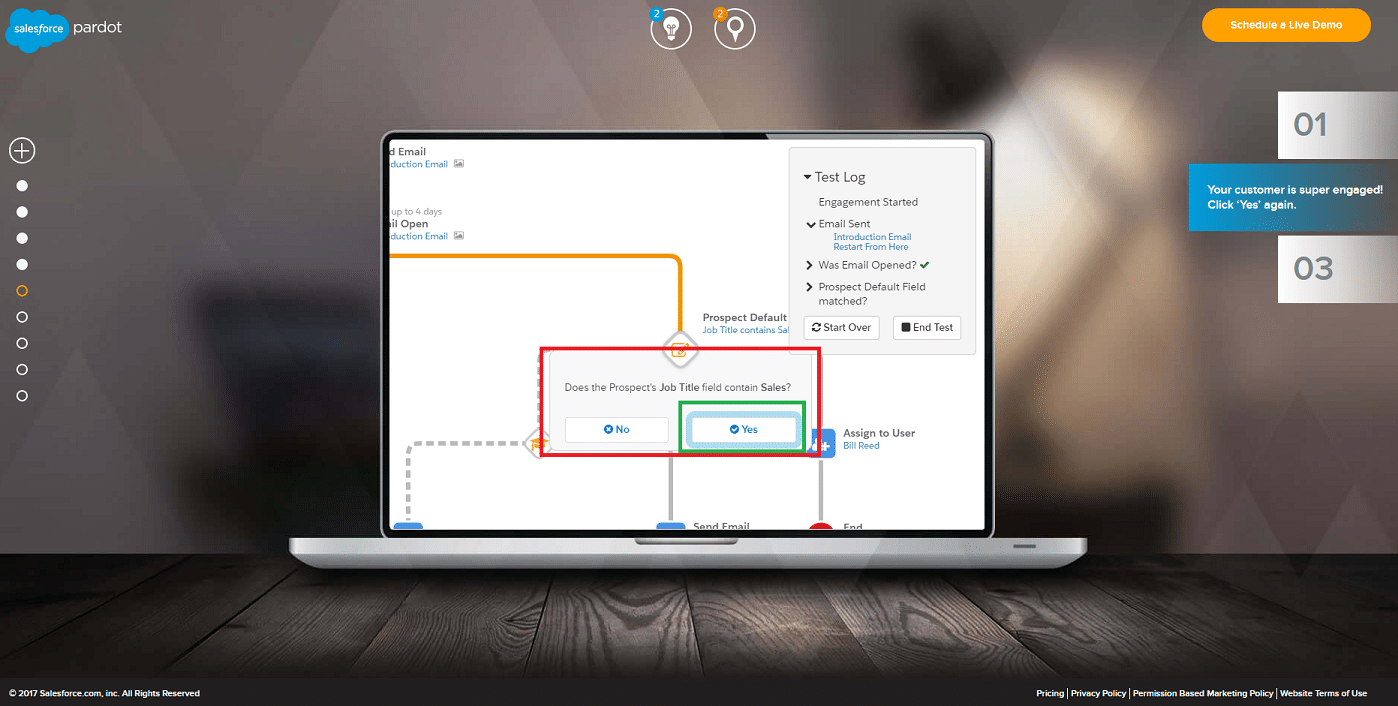
Next it asks if the job title of the recipient is sales. Select the yes option.
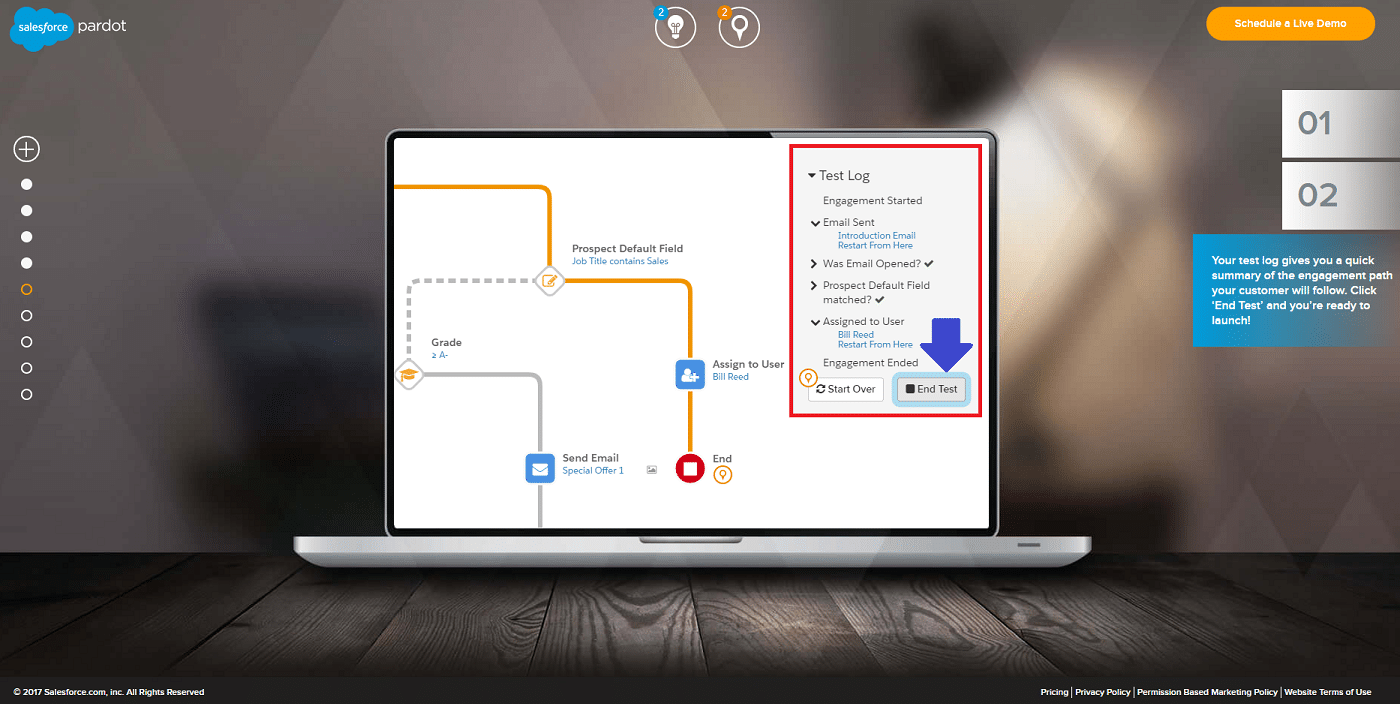
Now you can re-run the test to choose another pathway or end the test. Once you are finished, select end test.
Conducting A/B Tests
You need to know if your information is reaching your audience, engaging them, and they’re responding in some way.
The best way to do this is an A/B test. Pardot makes the testing completely easy. With their simple layouts and design features – this is a no brainer option to try out.
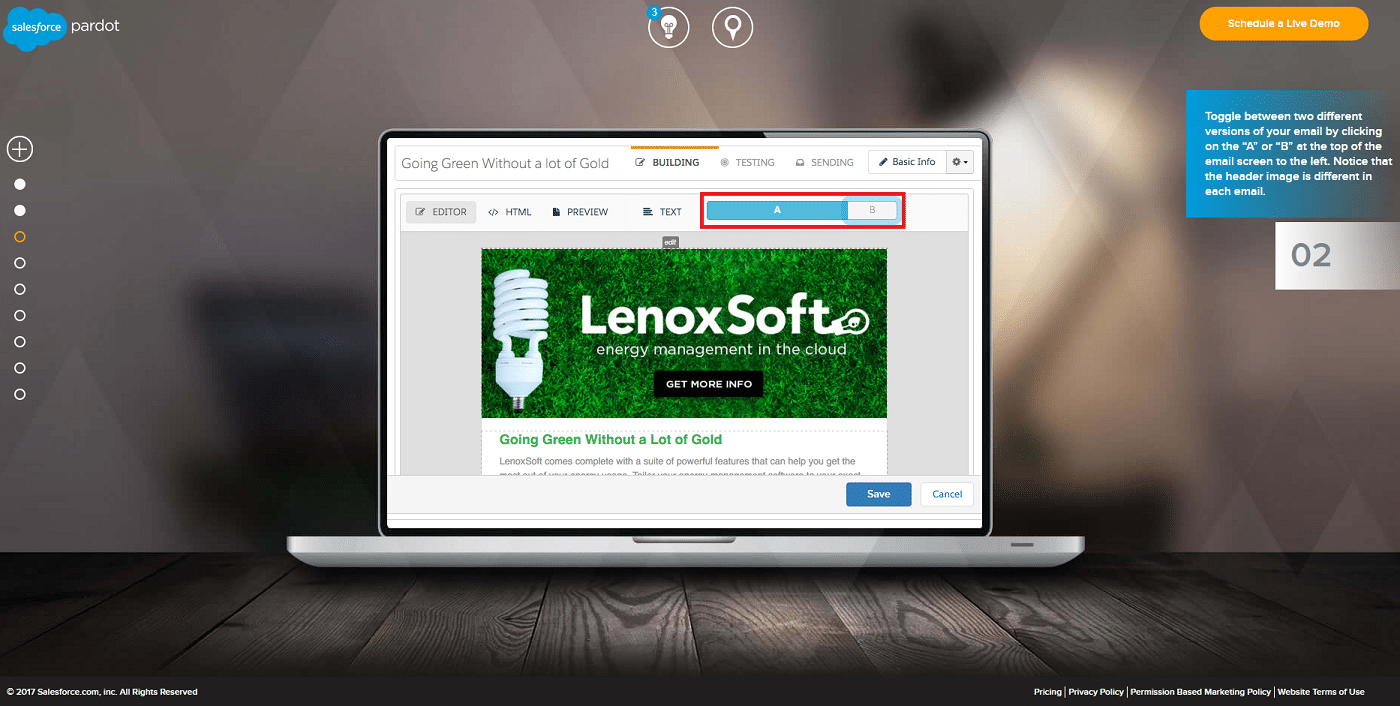
On your testing page, there is an icon at the top of the editor where you can choose A or B. Select the B button.
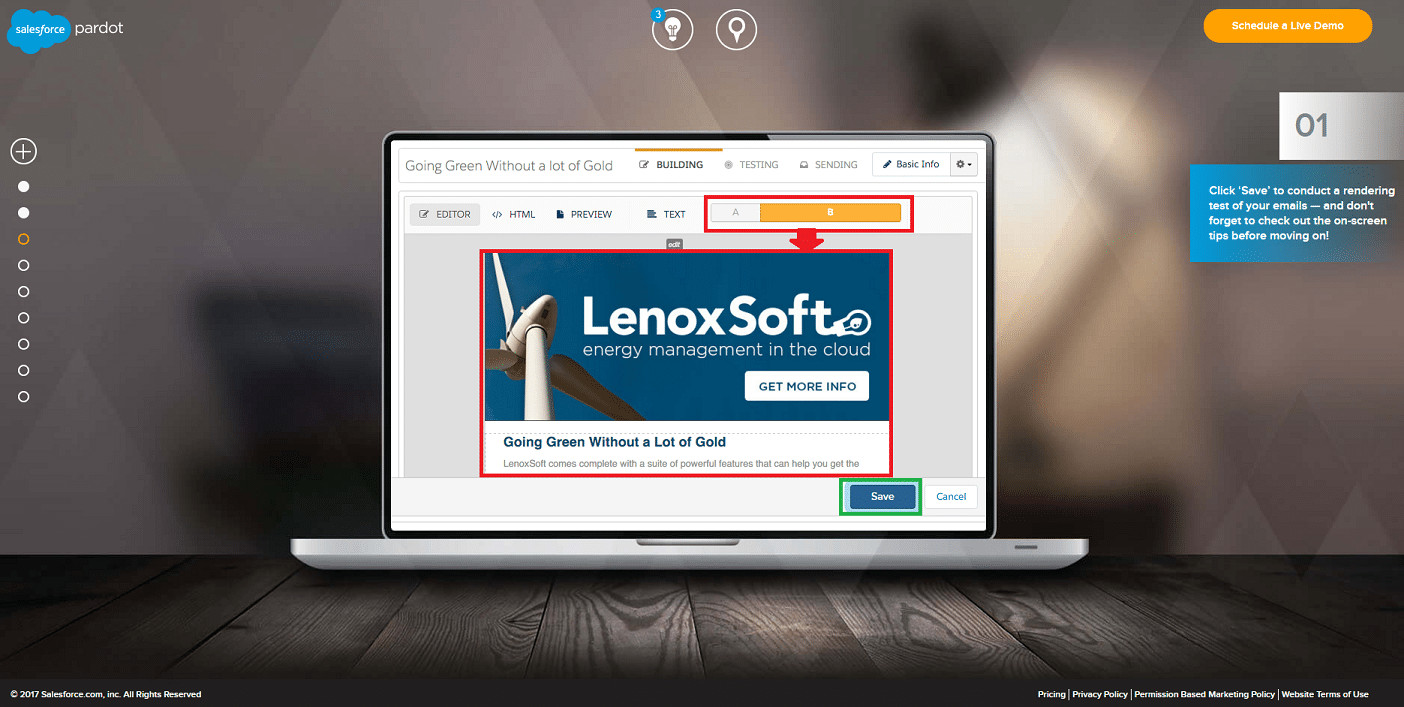
On the B layout, you can design your page like the previous one with slight differences – or choose something completely different. It’s your choice. Once you finish, select save.
This will start the testing if your pages are published.
Send Emails
It’s now time to send out your emails and bring those leads in to convert them into customers.
Sending emails is an effortless process, once you integrate your email service to the platform.
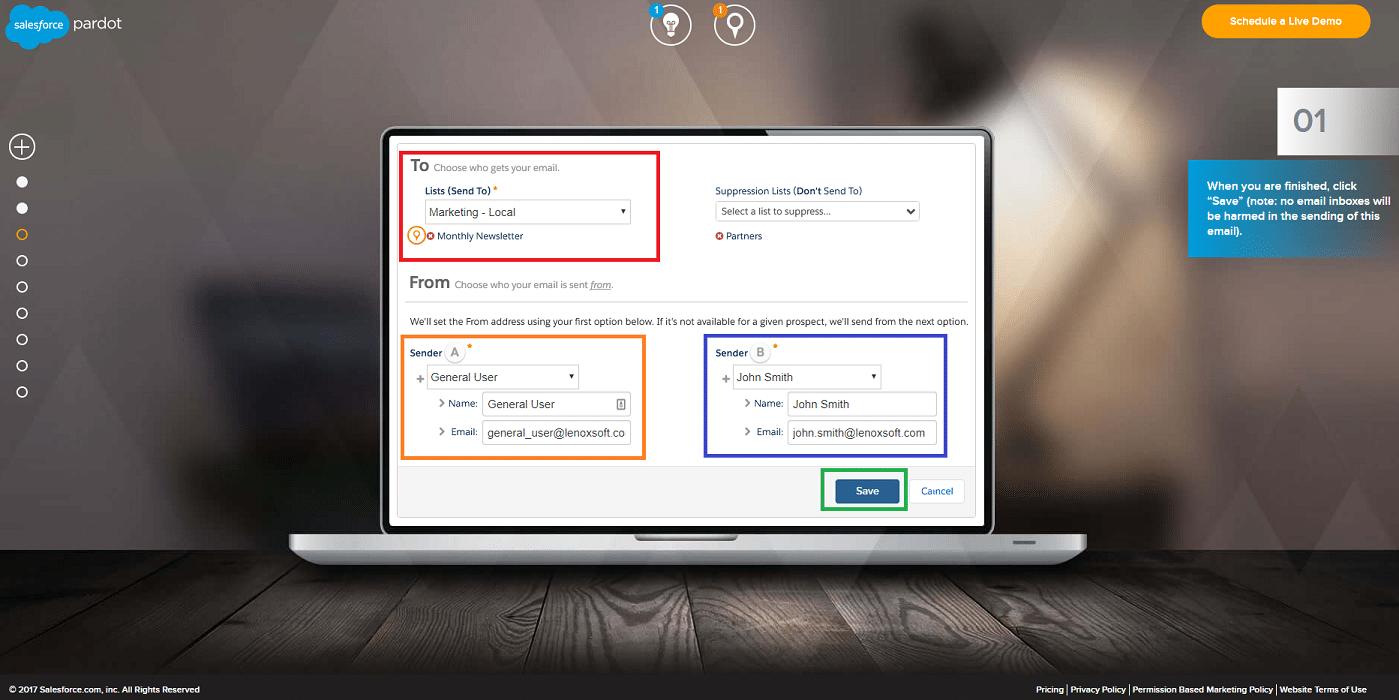
You select who you’re sending your email to, so your contacts list. Select who the senders are and then select save. That’s all you need to do.
Your campaign has now been sent out and should follow the course of your campaign design.
View Your Reports
Lastly are the reports and data. Not everyone loves looking at the statistical data you’re provided with, especially if you can’t understand most of it.
Pardot does include those complex features, however, they also provide you with numbers and figures everyone can understand.
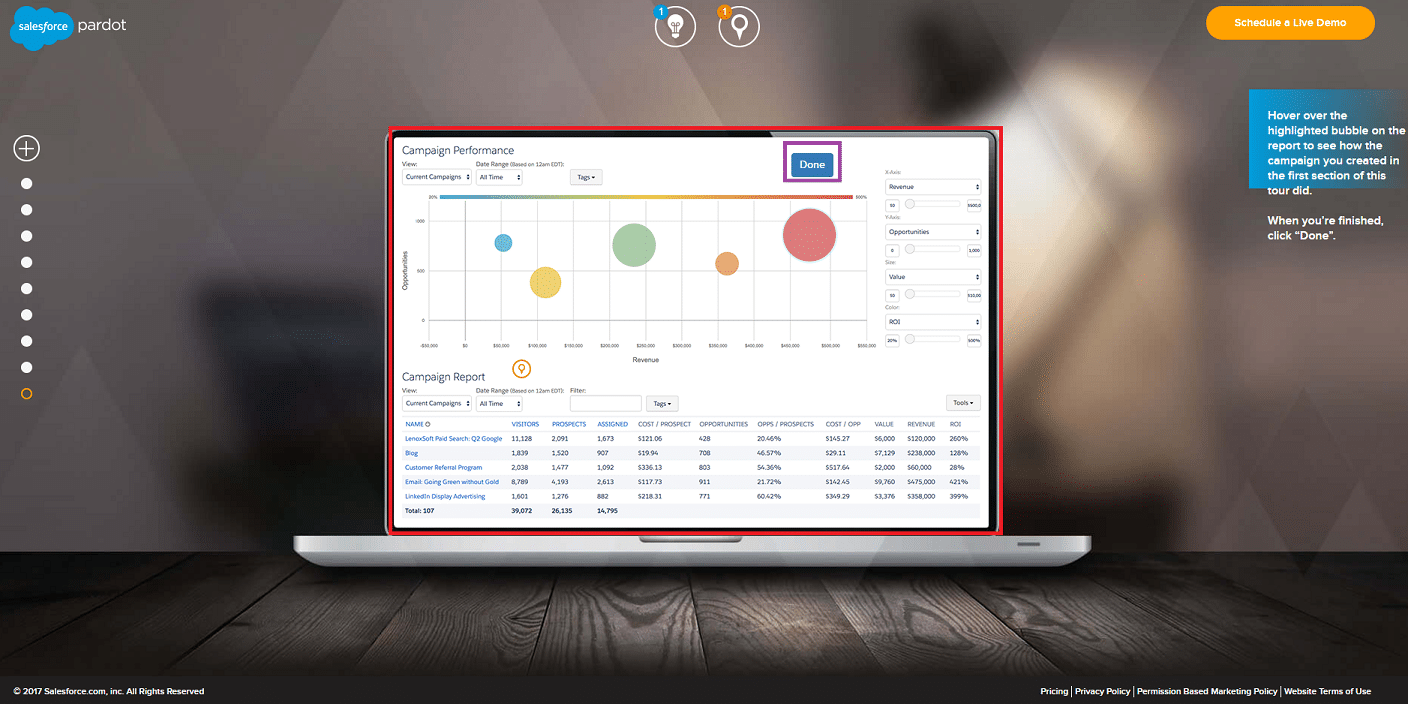
First is your campaign performance. This includes a graph, and a report for you to follow through.
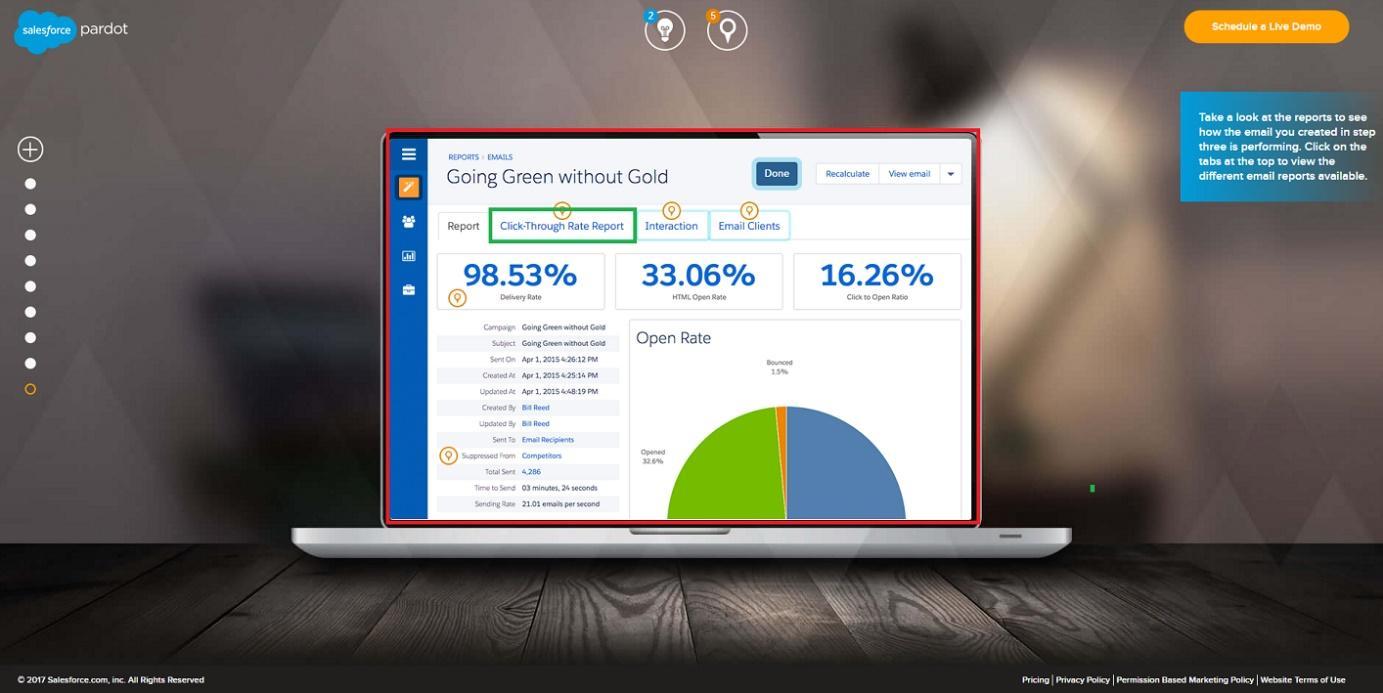
Then we have the overview, where we can first see the report of our email. Click on the Click-Through Rate Report to continue.
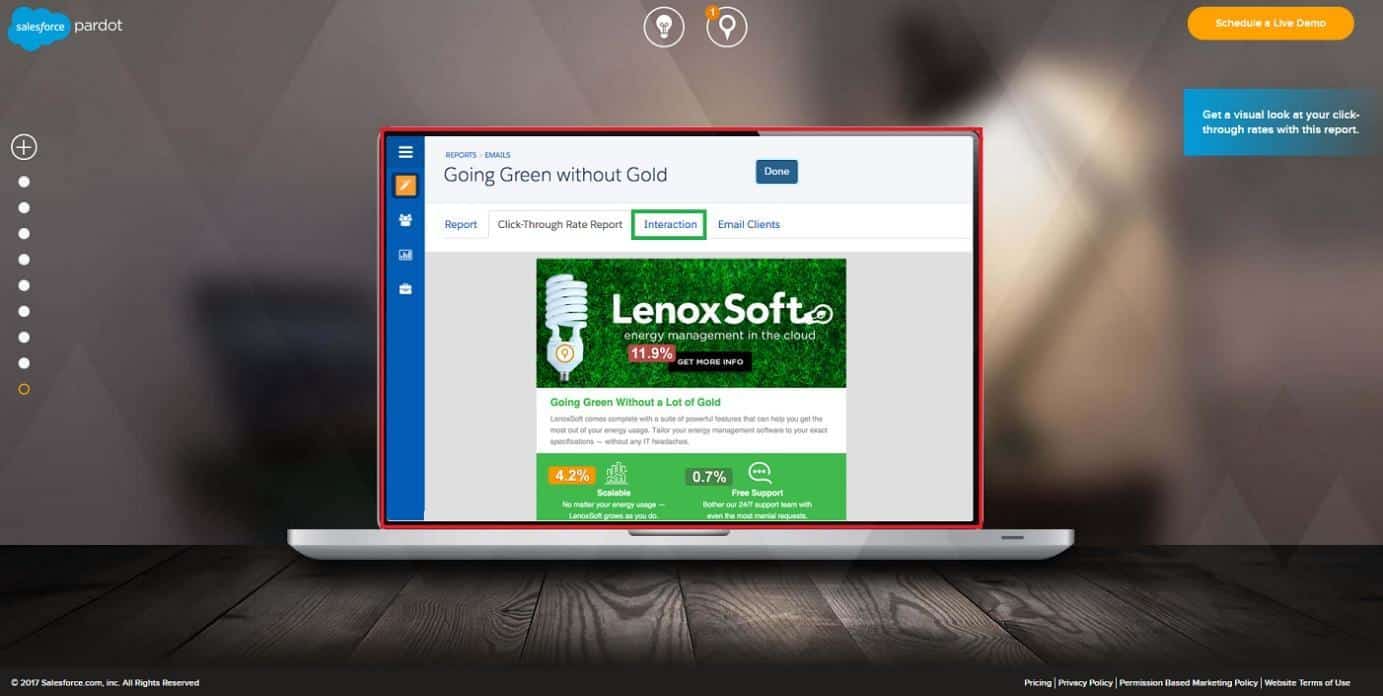
Here we can see the success of our opt-in bringing in our potential leads, where they click, and what percentage. To move on, click the interactions option.
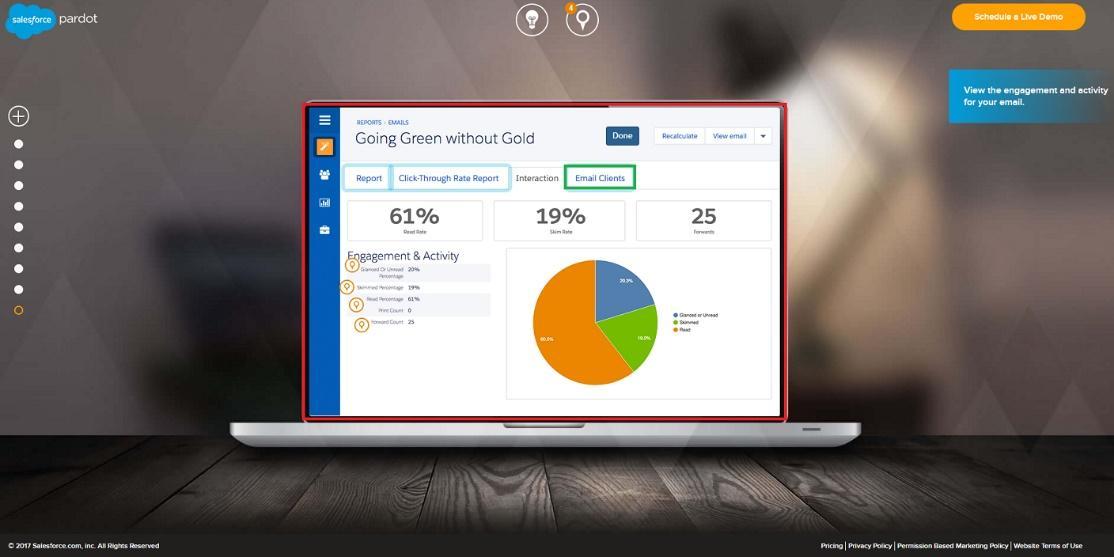
This is where you can view your engagement and activity from your email sent. Click on Email Clients to proceed.
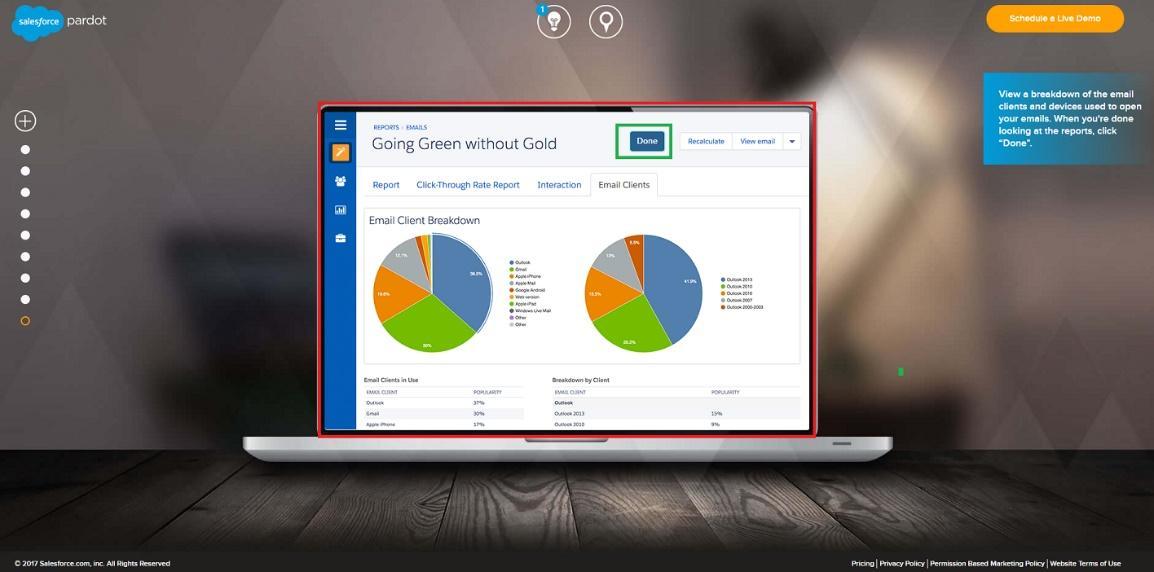
Lastly, you can see the breakdown of your email. This is where you can view the clients you have and their demographics.
That’s all there is to the reports. Pretty simple, but can be complex if you want it to be.
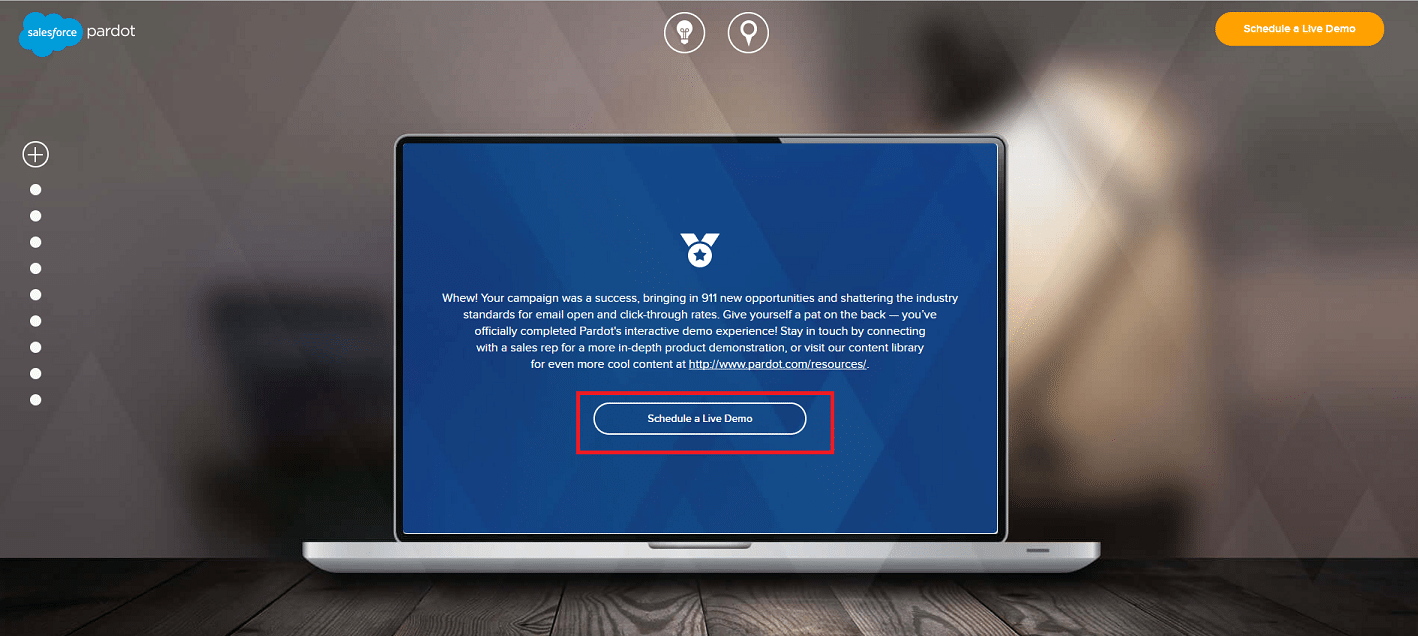
CONCLUSION
I liked using the demo version provided by Pardot, but I do wish they would offer a trial so I could have gotten the feel for the entire website and the features the provide. They may have great integration for any marketing automation features but with a free plan I’m not able to test them out fully.
I think with the pricing of this service, there should be a free trial or more features added to the demo, though it takes some time to get through.
Finally, what I did experience was all good features. The layout design was very simple and modern, but I liked that I could edit some features in great detail.
I recommend trying the live demo before joining this service. For the price, no free trial, and the demo I experienced – I think there needs to be a little more provided on this service.